xDai Bridge with Safe App
The xDai Bridge is now included as a native Gnosis Safe application, and Multisig Wallets on both Ethereum and Gnosis Chain can interact with the bridge directly from the safe. The following instructions are for bridging xDai to Dai and vice versa. To bridge any other ERC20s, see the Omnibridge + Gnosis Safe instructions.
Initiating a Transaction
-
Go to your Gnosis Safe and login and connect. You will want to access the safe you are bridging from first (if moving xDai to Dai, start with the xDai bridge). Safe addresses are distinct for each chain.
-
Go to Apps and find the xDai Bridge App. Apps are typically displayed in alphabetical order. Click to access.
-
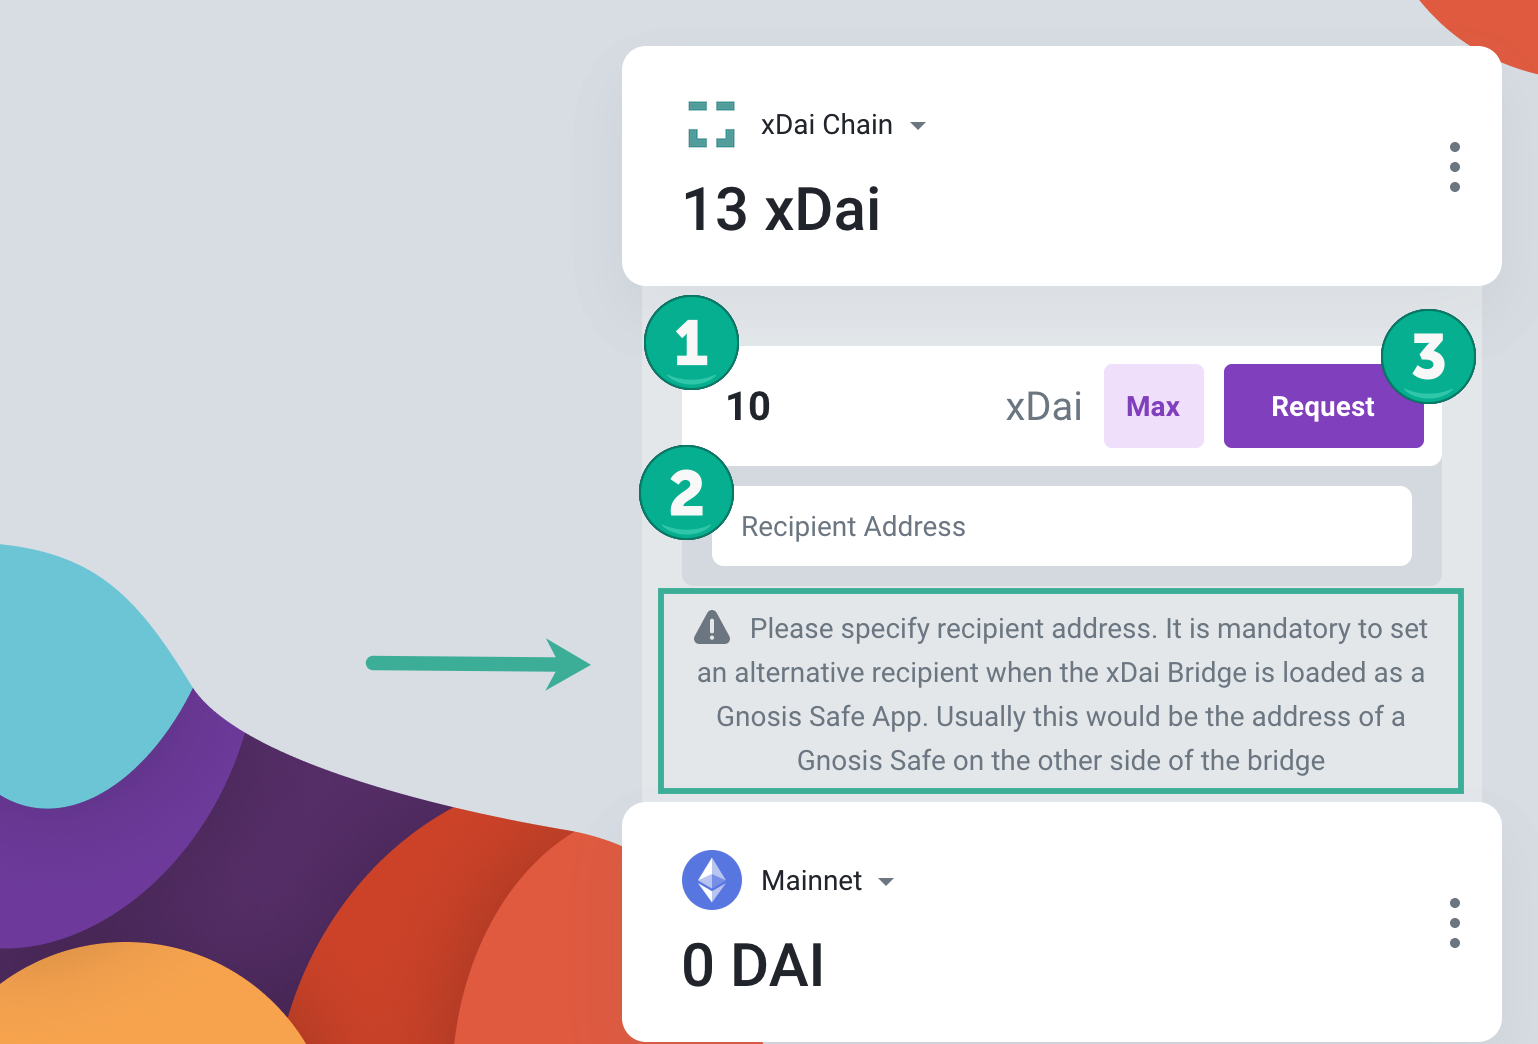
Open the application and interact with the bridge as you normally would to begin the transfer process. **** In the following example we bridge xDai on the Gnosis chain to Dai on Ethereum. The minimum amount to initiate a bridge transfer is 10 xDai. Enter:
- xDai Amount
- Recipient Address
- Click Request.
The Mainnet amount will show 0 DAI, as your Gnosis safe address on the Ethereum Mainnet is different and will not correspond with any Dai amount in a mainnet safe.
When bridging with a safe you will set a Recipient Address. This may be a 2nd safe contract on the receiving chain or an individual address to receive the funds. The app will not let you proceed until you set the Recipient Address.
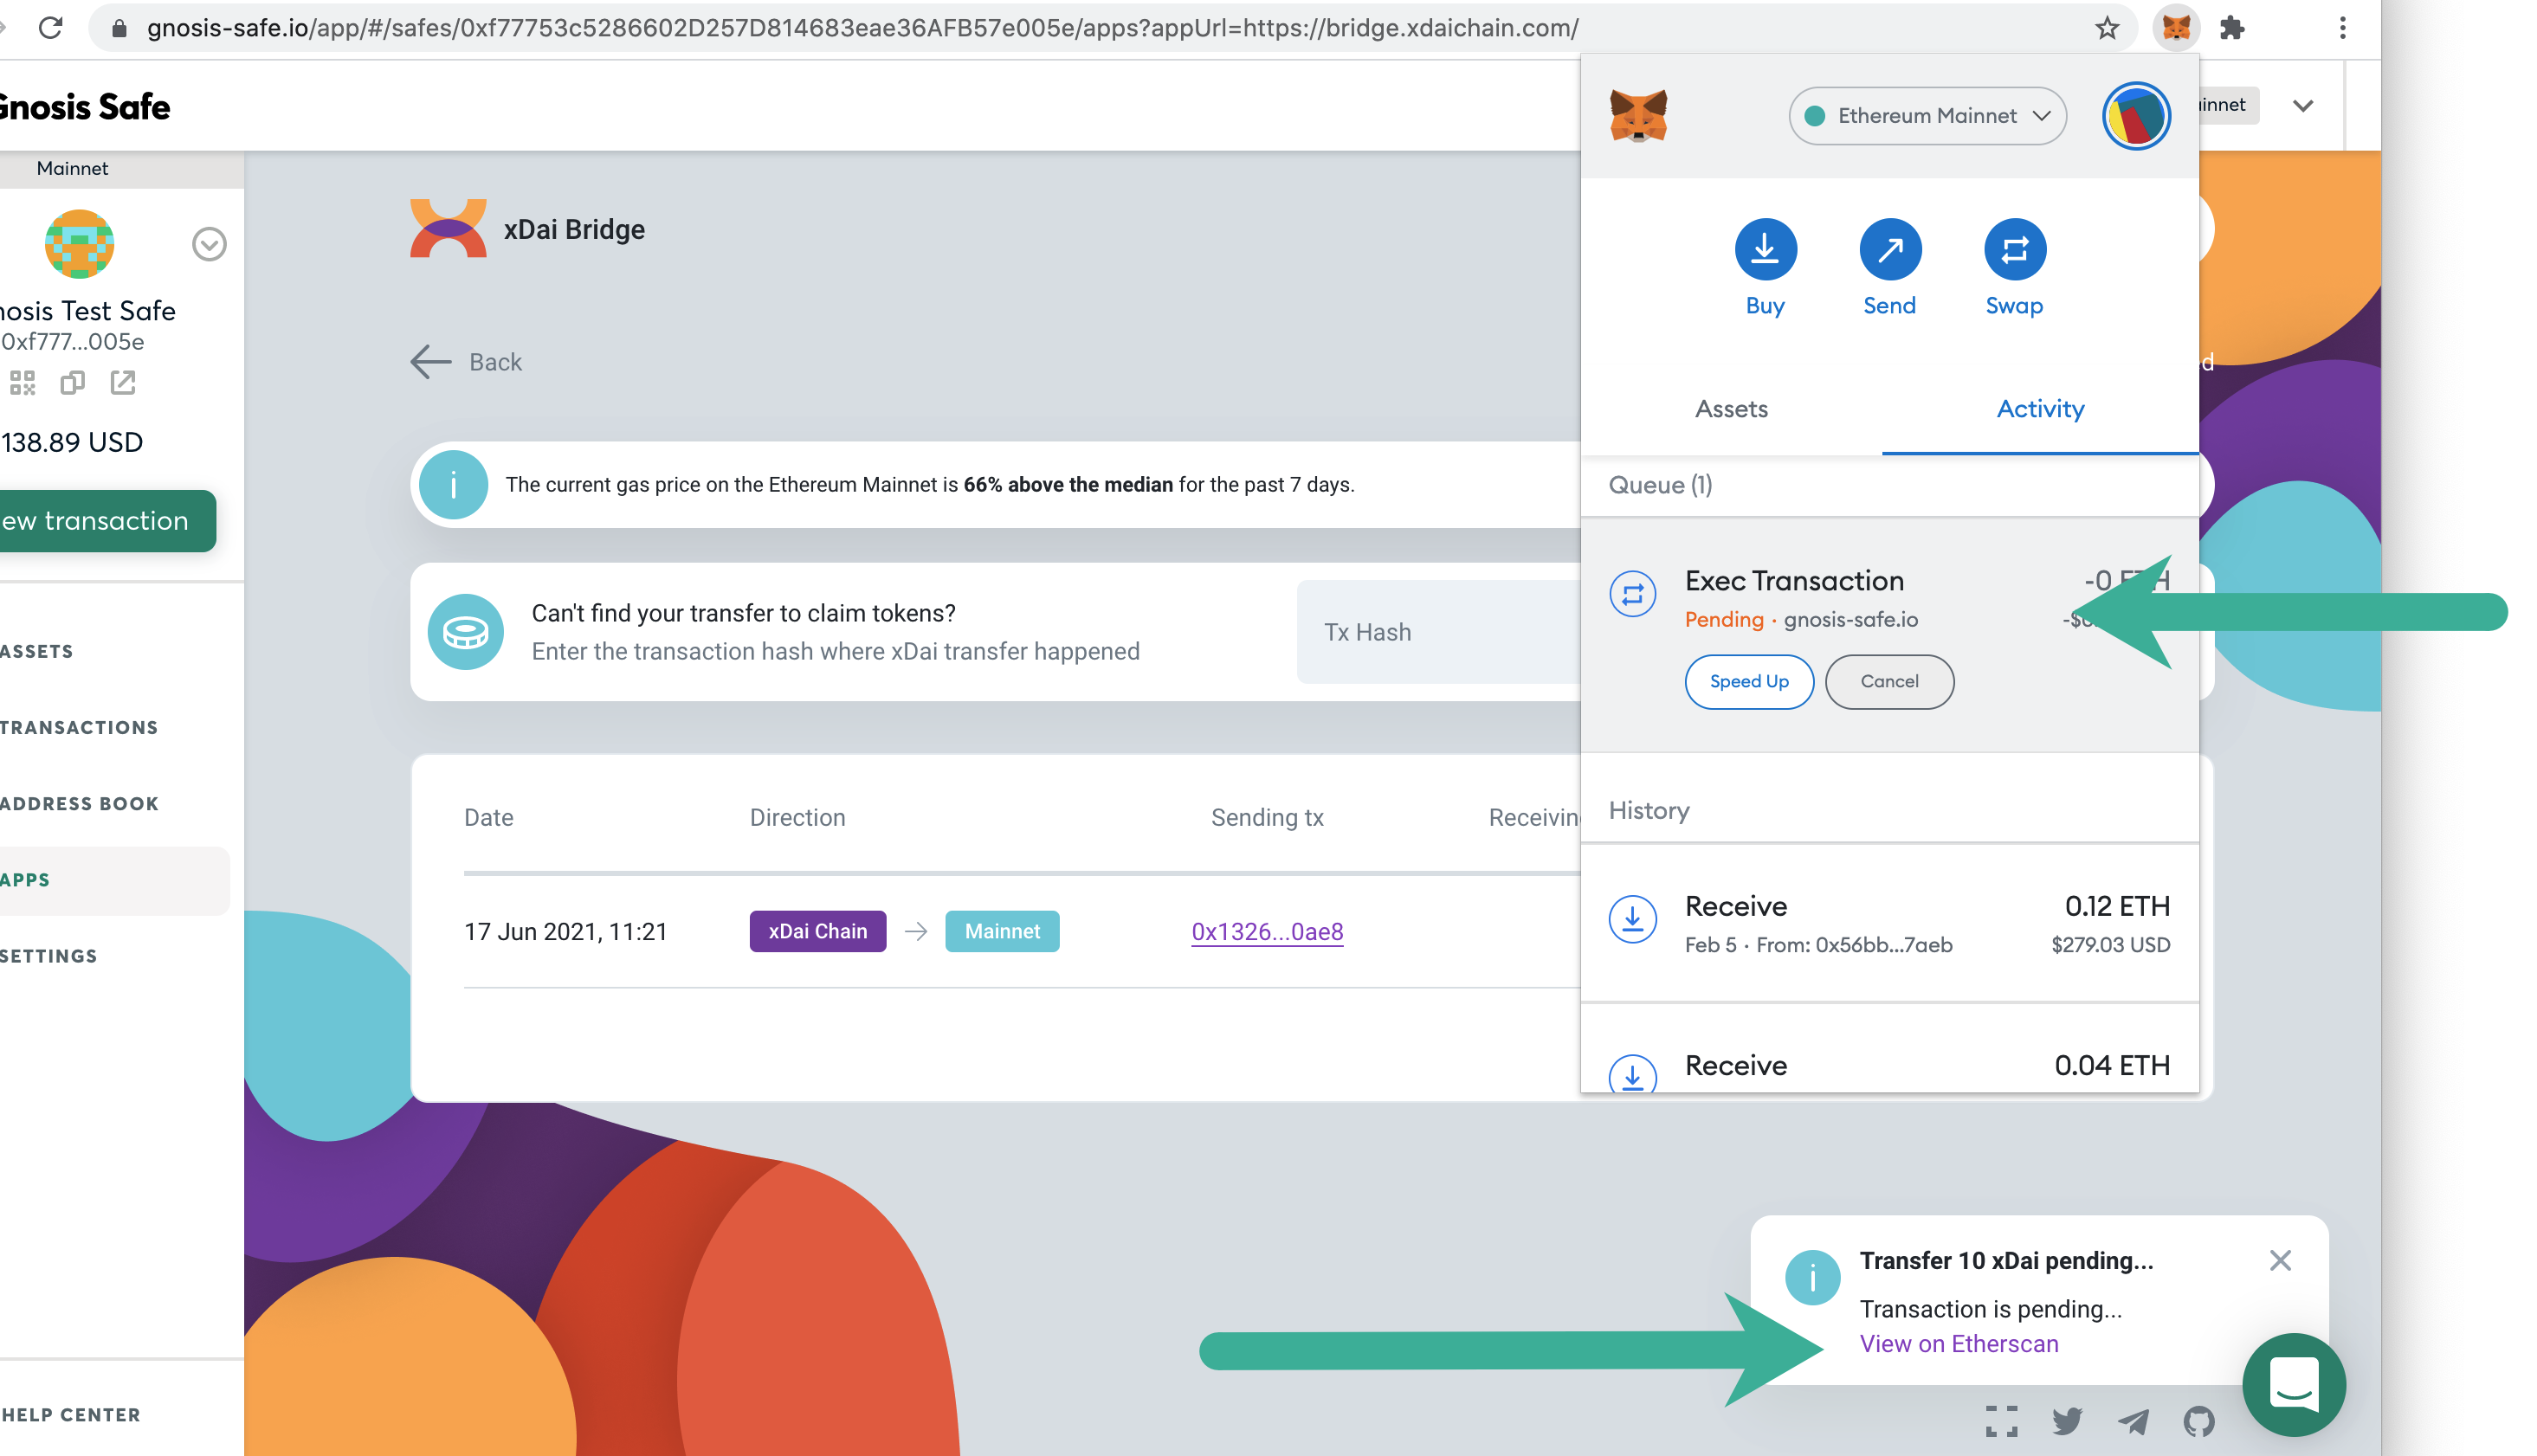
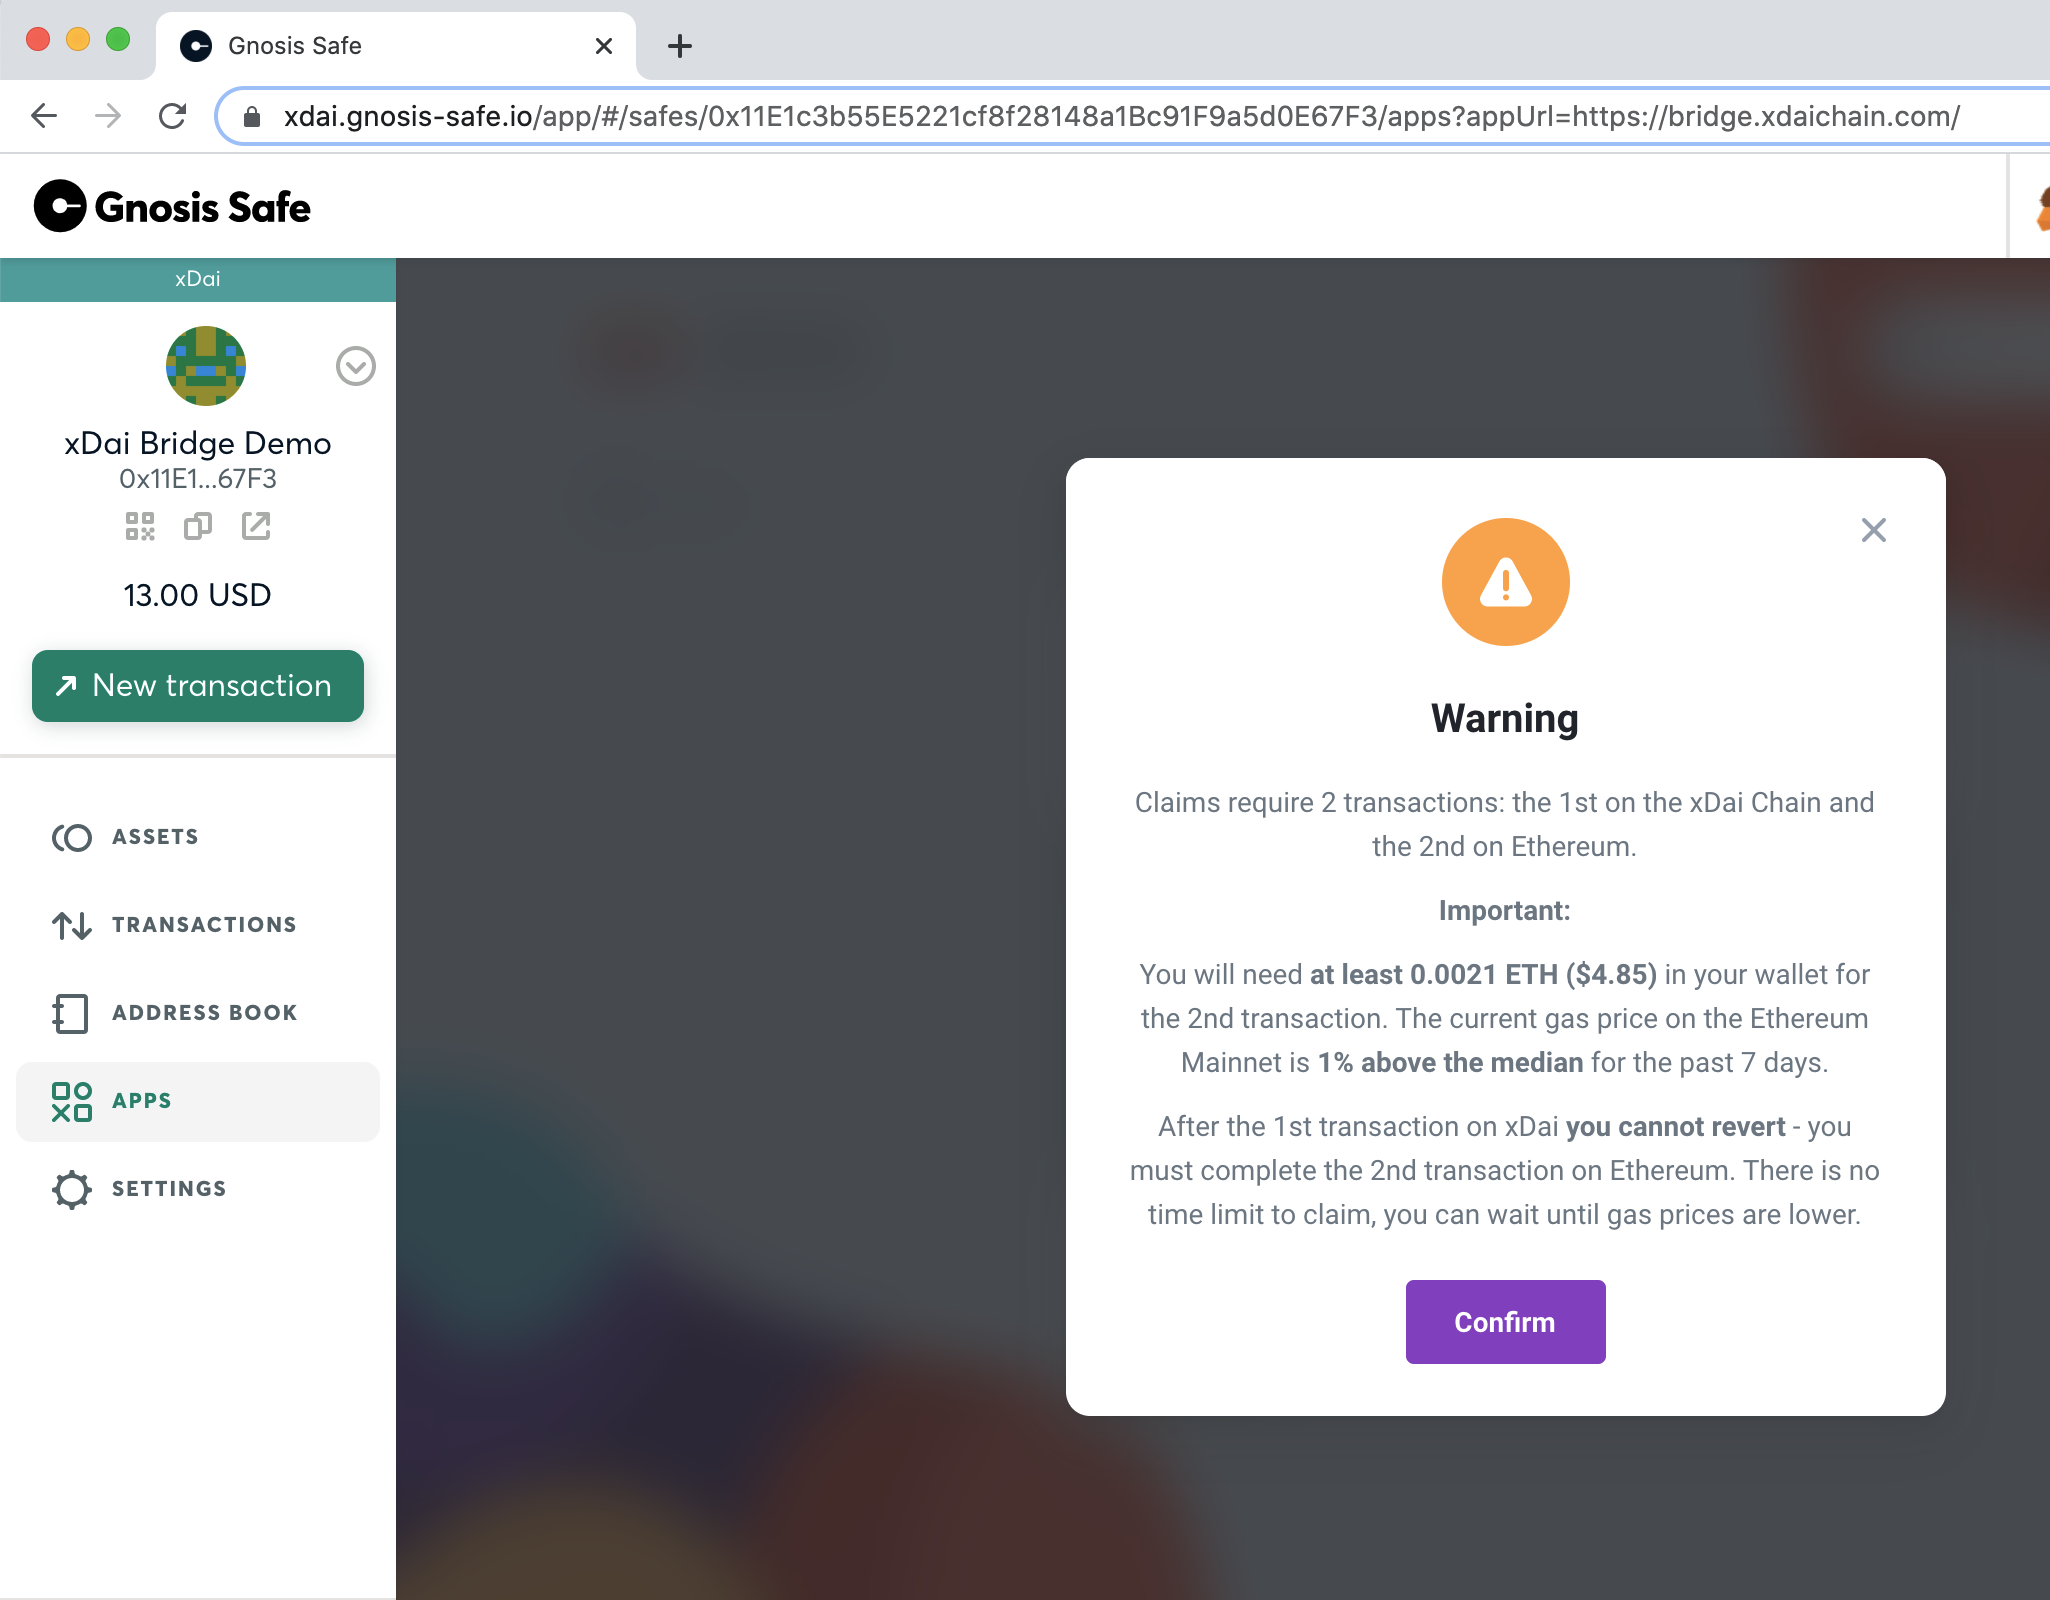
Once you request to bridge xDai, you will see this warning reminding you about the claims process. xDai funds are required on one of the owner's wallets to initiate the transfer process, and Eth on Ethereum to claim bridged Dai.
- On submission, the required number of safe owners each need to submit and sign to process the request. This does not require any xDai.
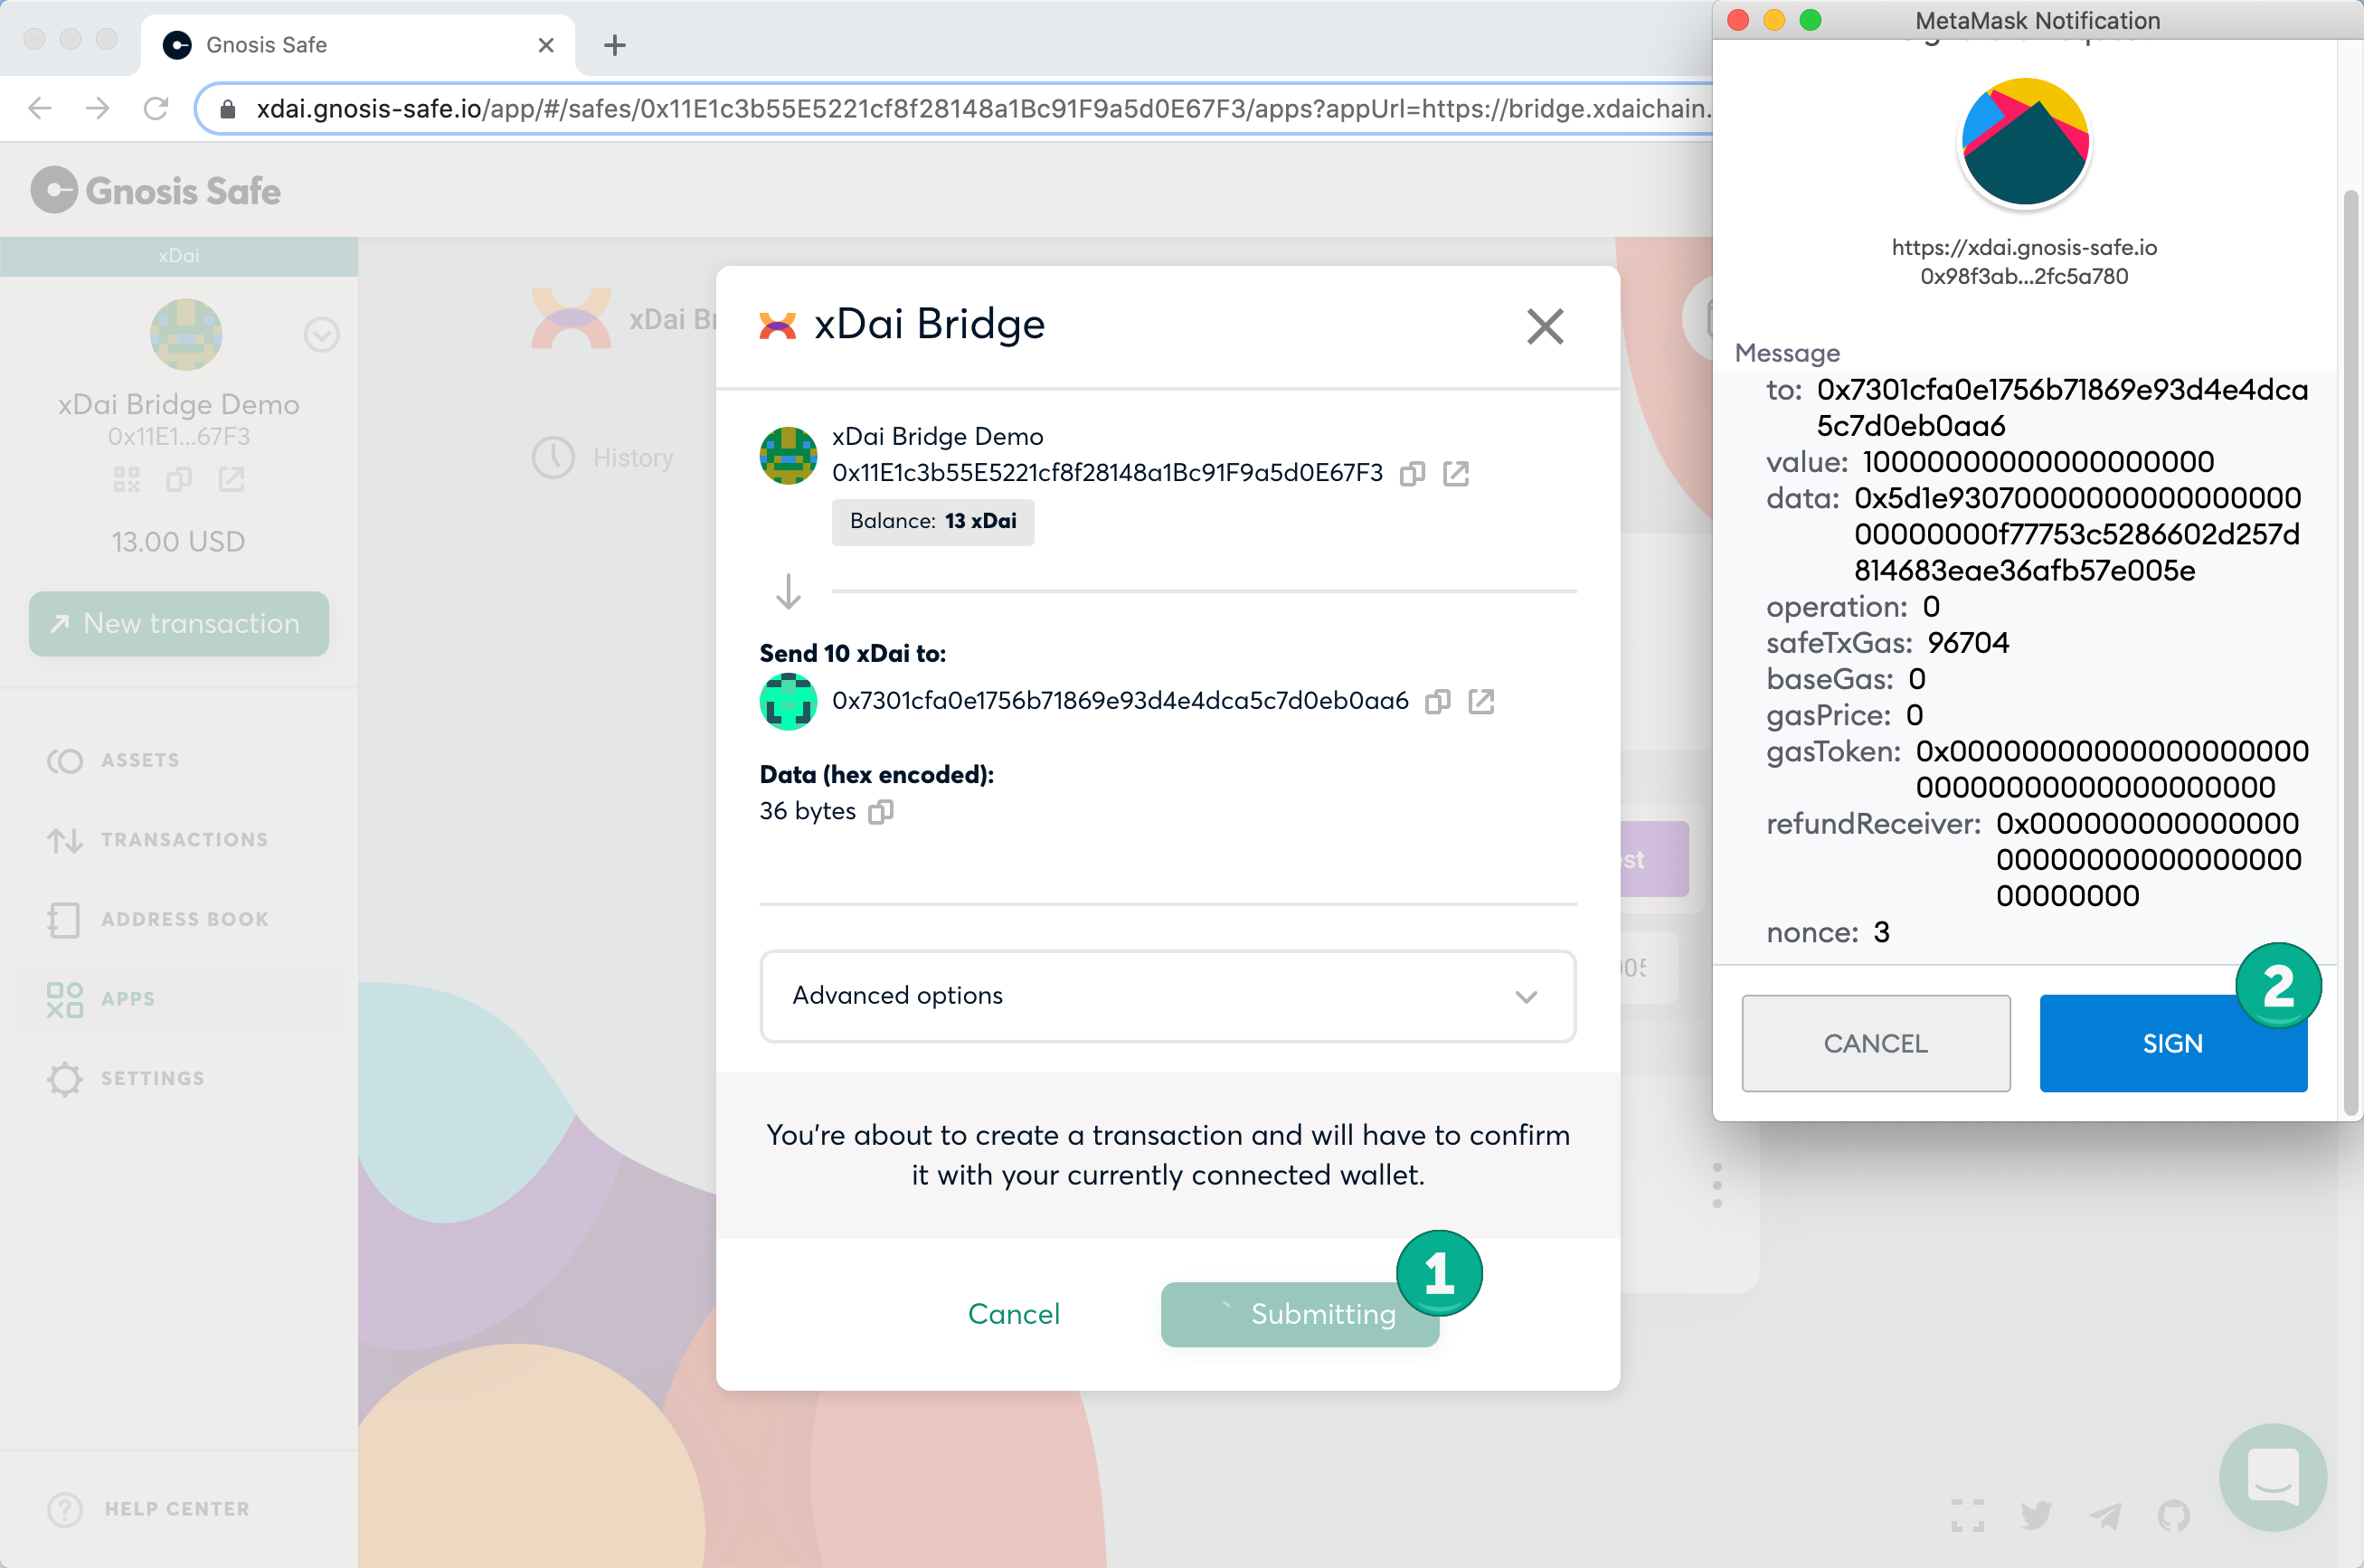
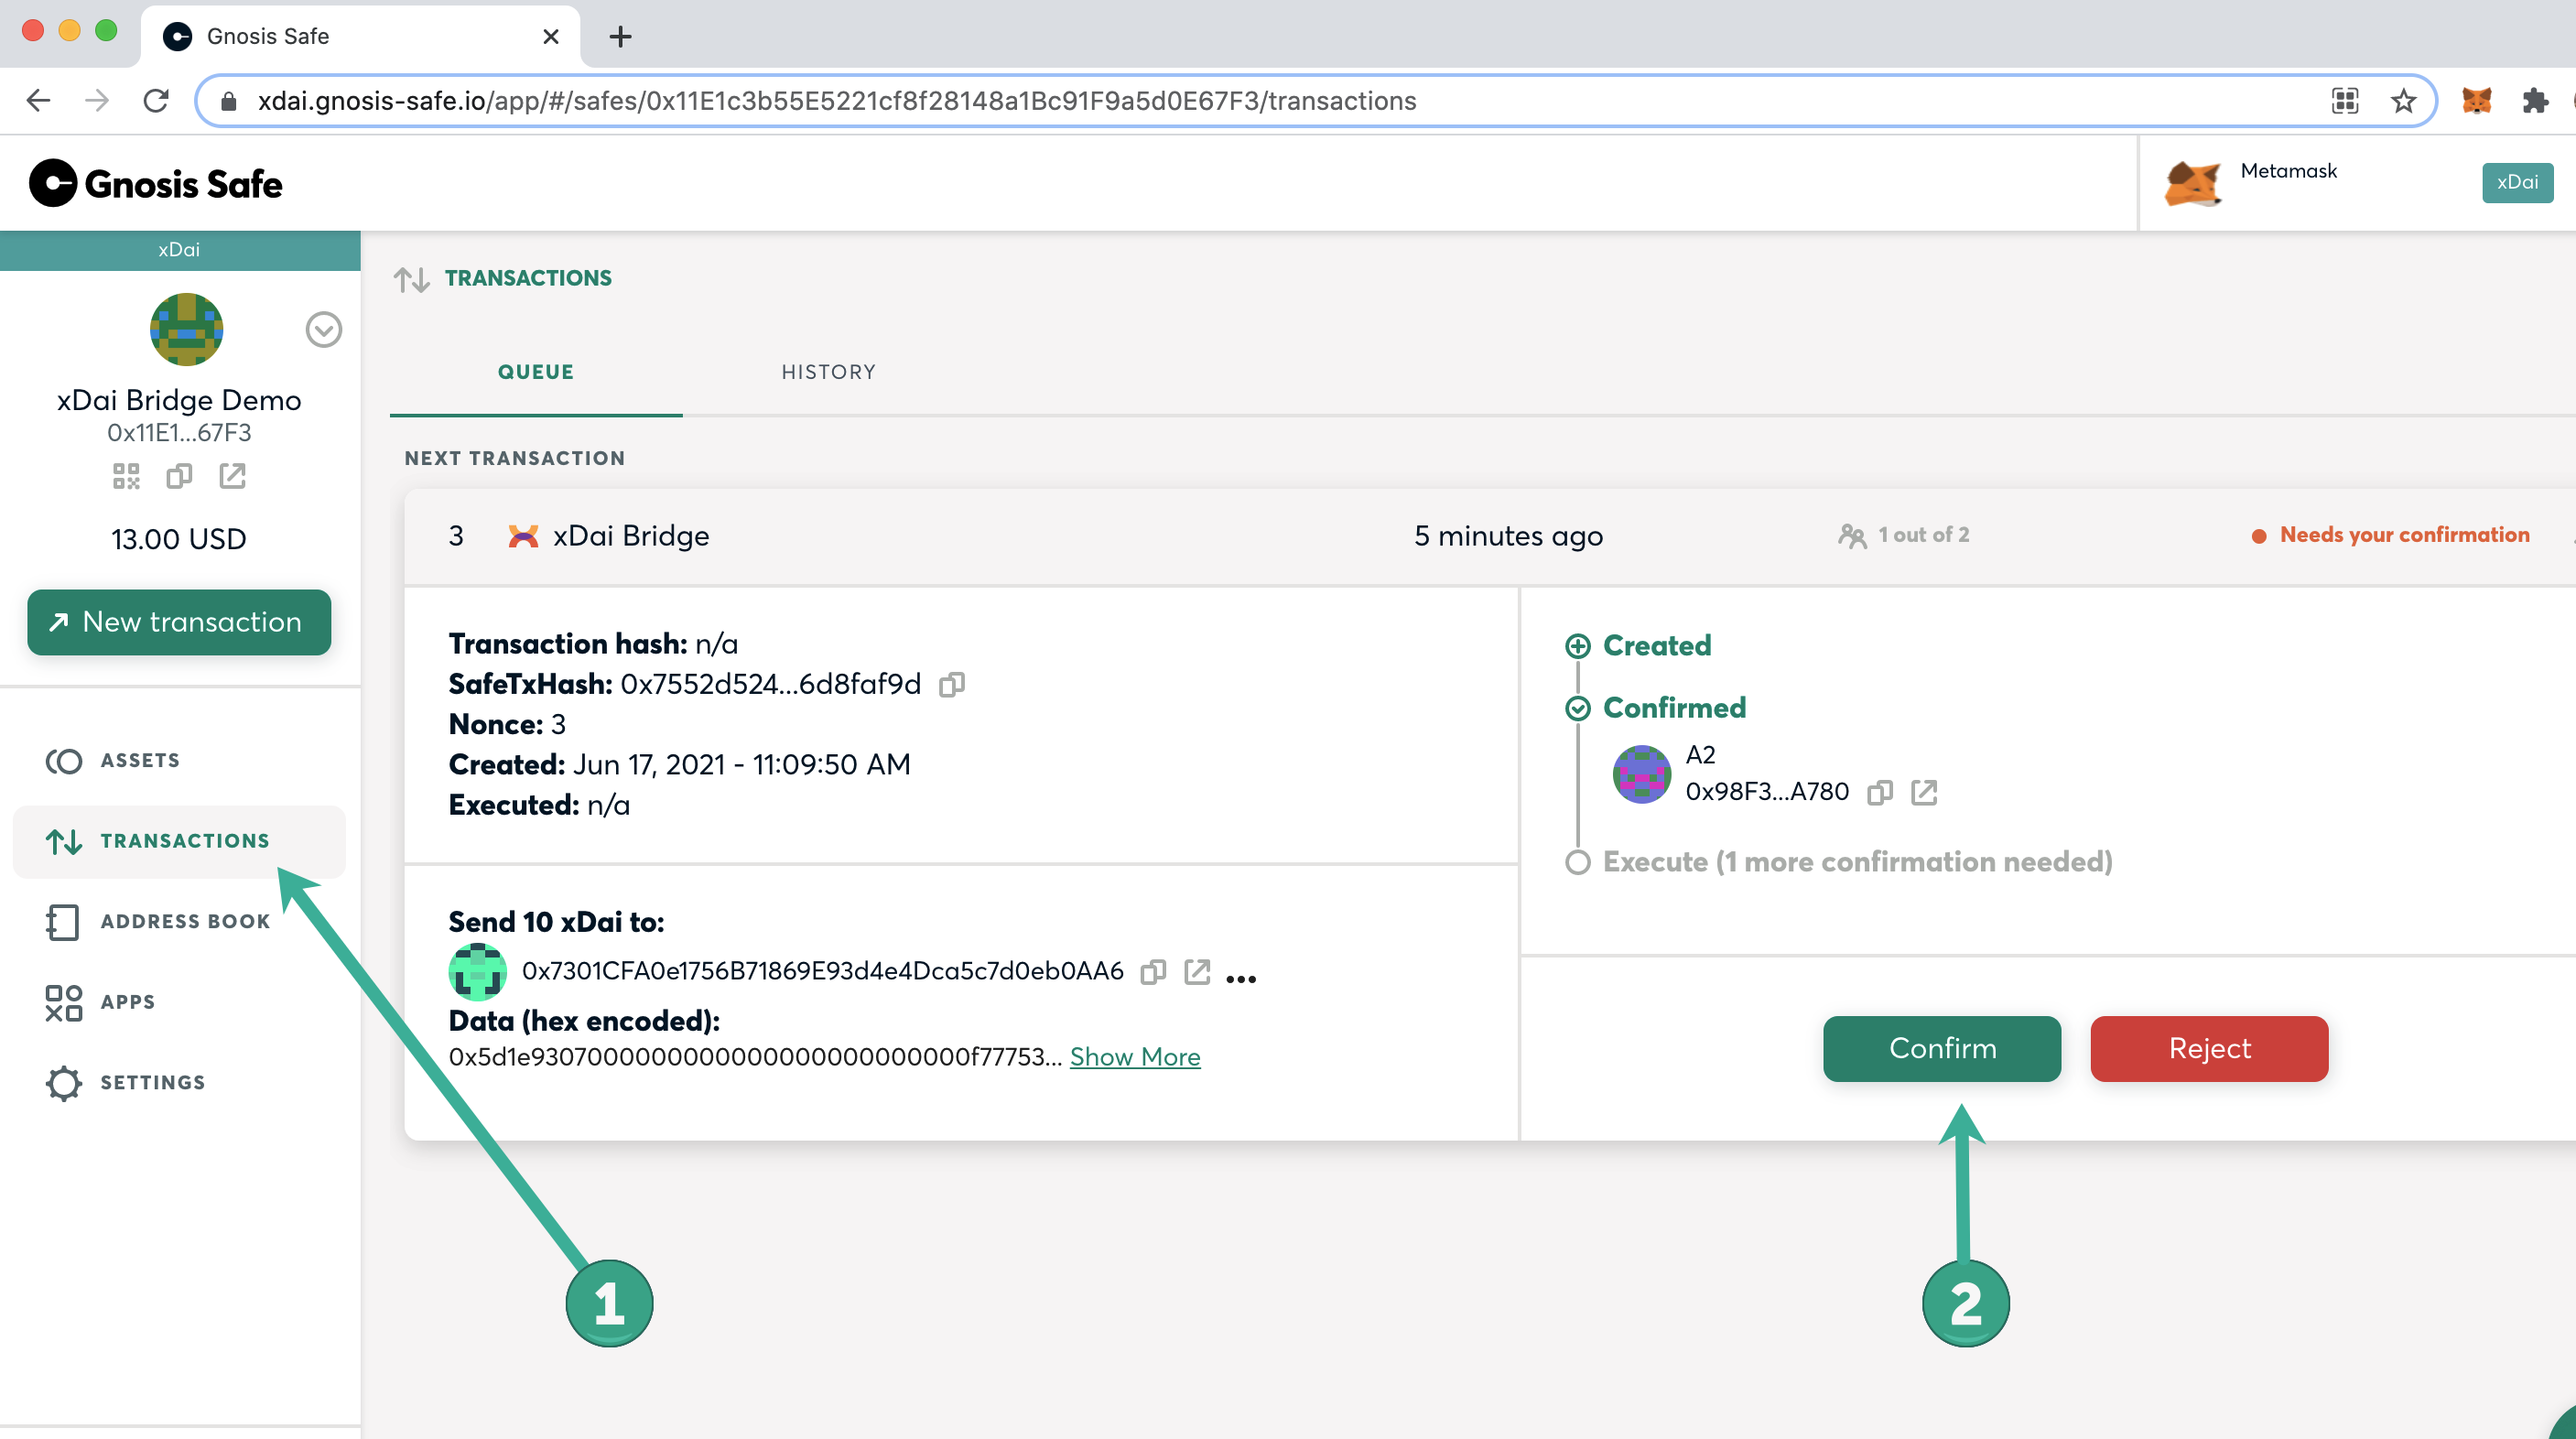
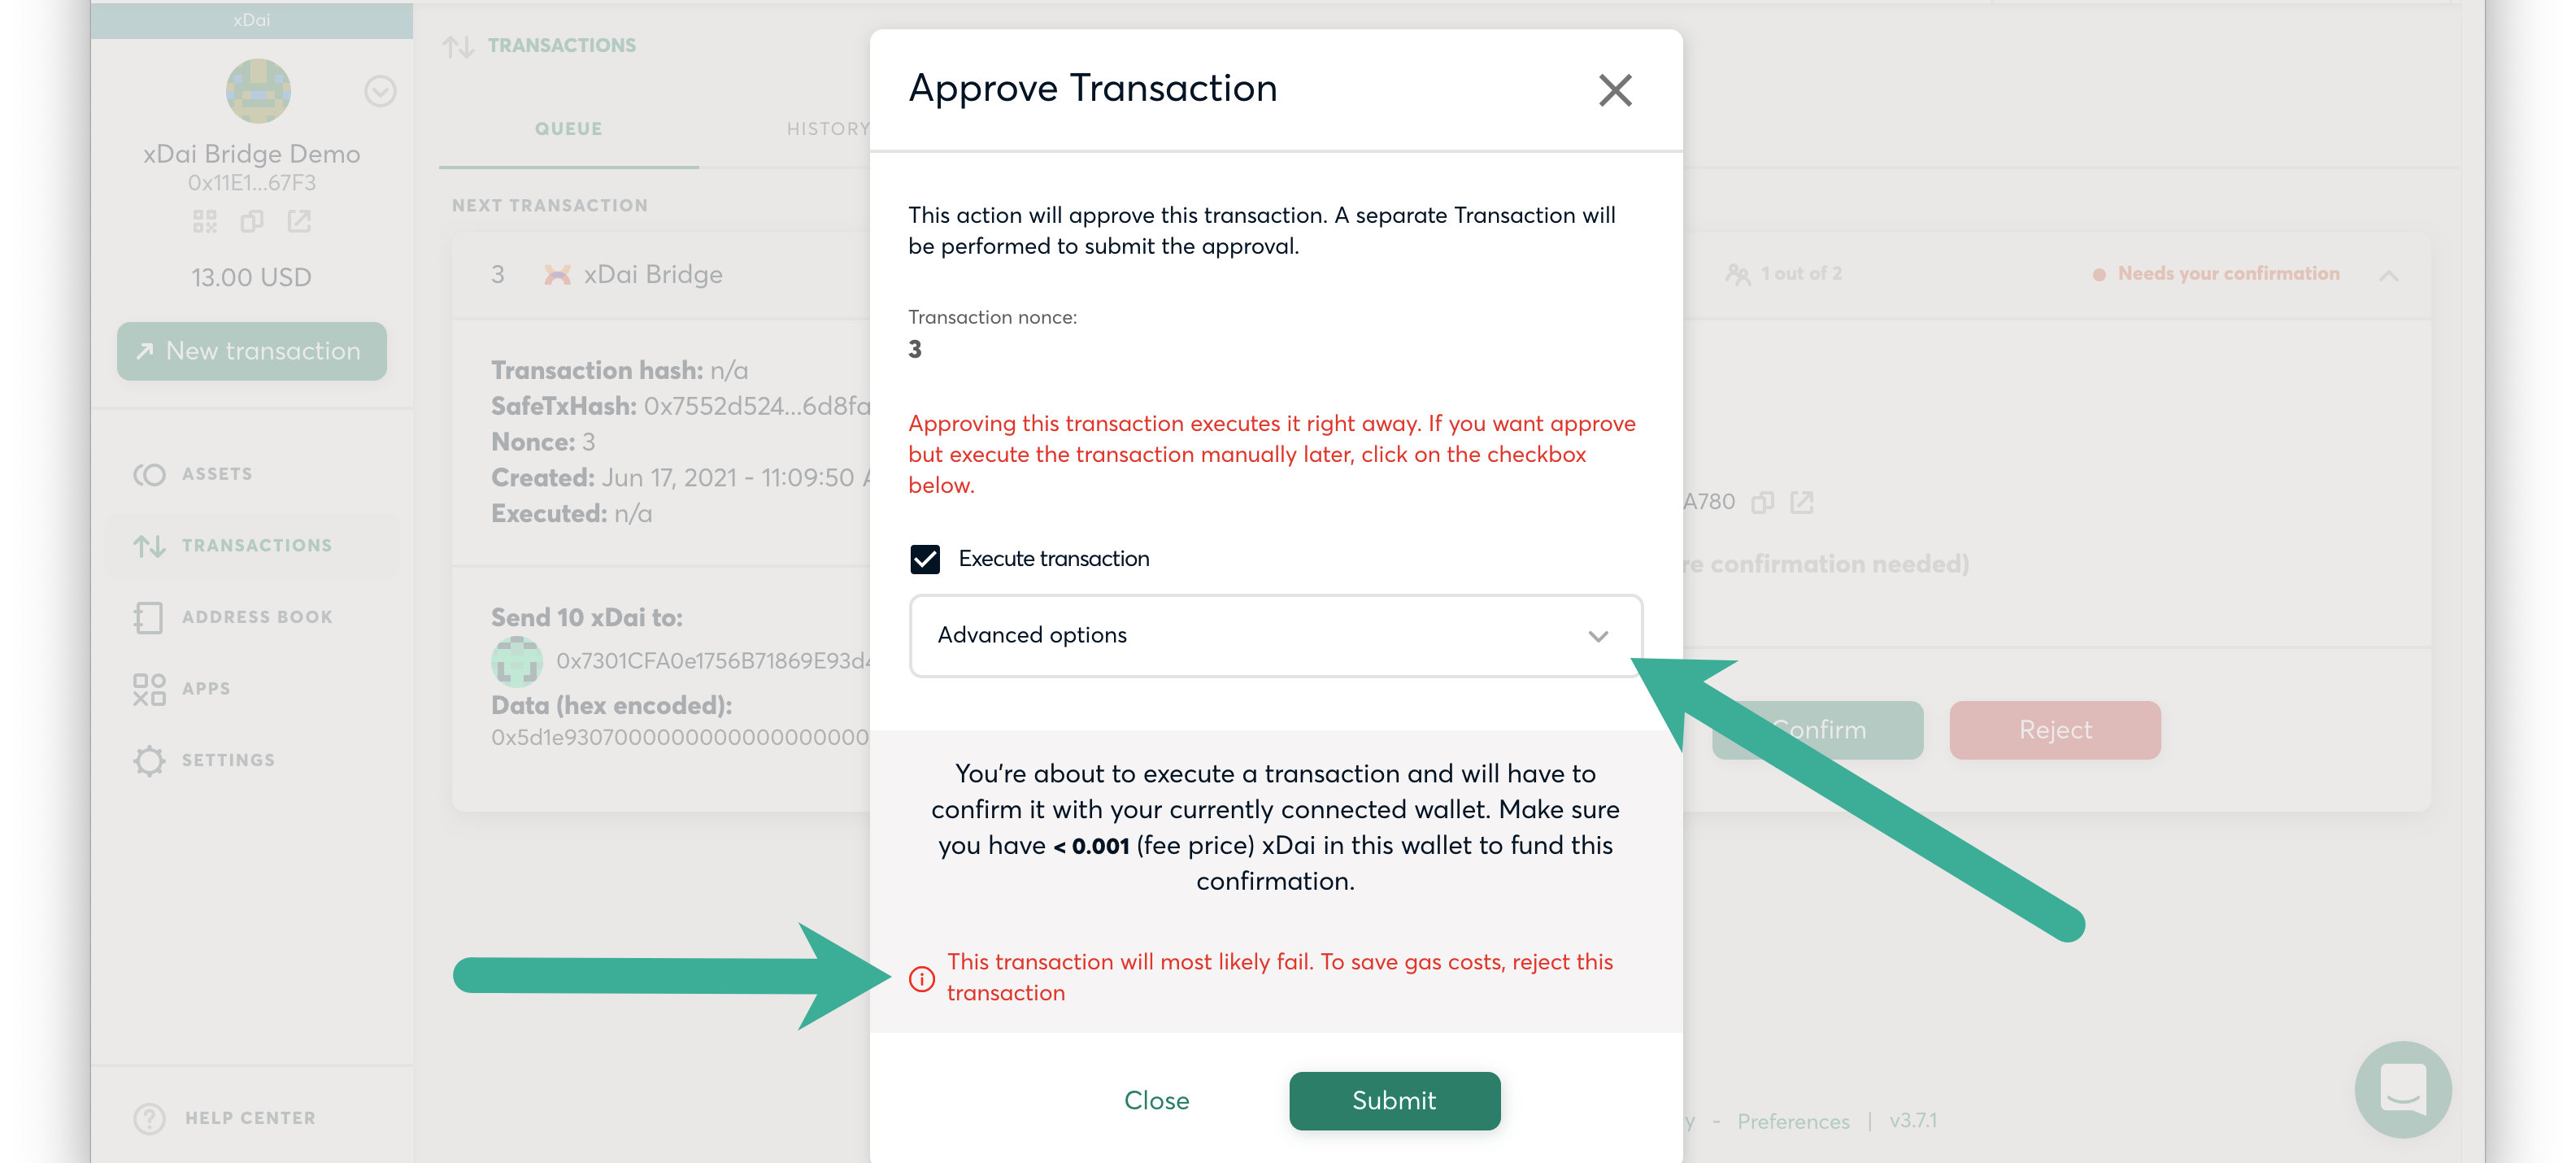
The final signature owner (required number of signatures are set through the gnosis safe settings) then needs to confirm. Any owner can then execute the tx and pay for the initial transfer transaction with xDai once this quorum has been met. In this example, a second owner goes to the transactions menu in their safe to find transaction needs your confirmation.
- Execute the transaction on the Gnosis chain. In this case, a warning message appears related to the gas limit which is set too low by the application.
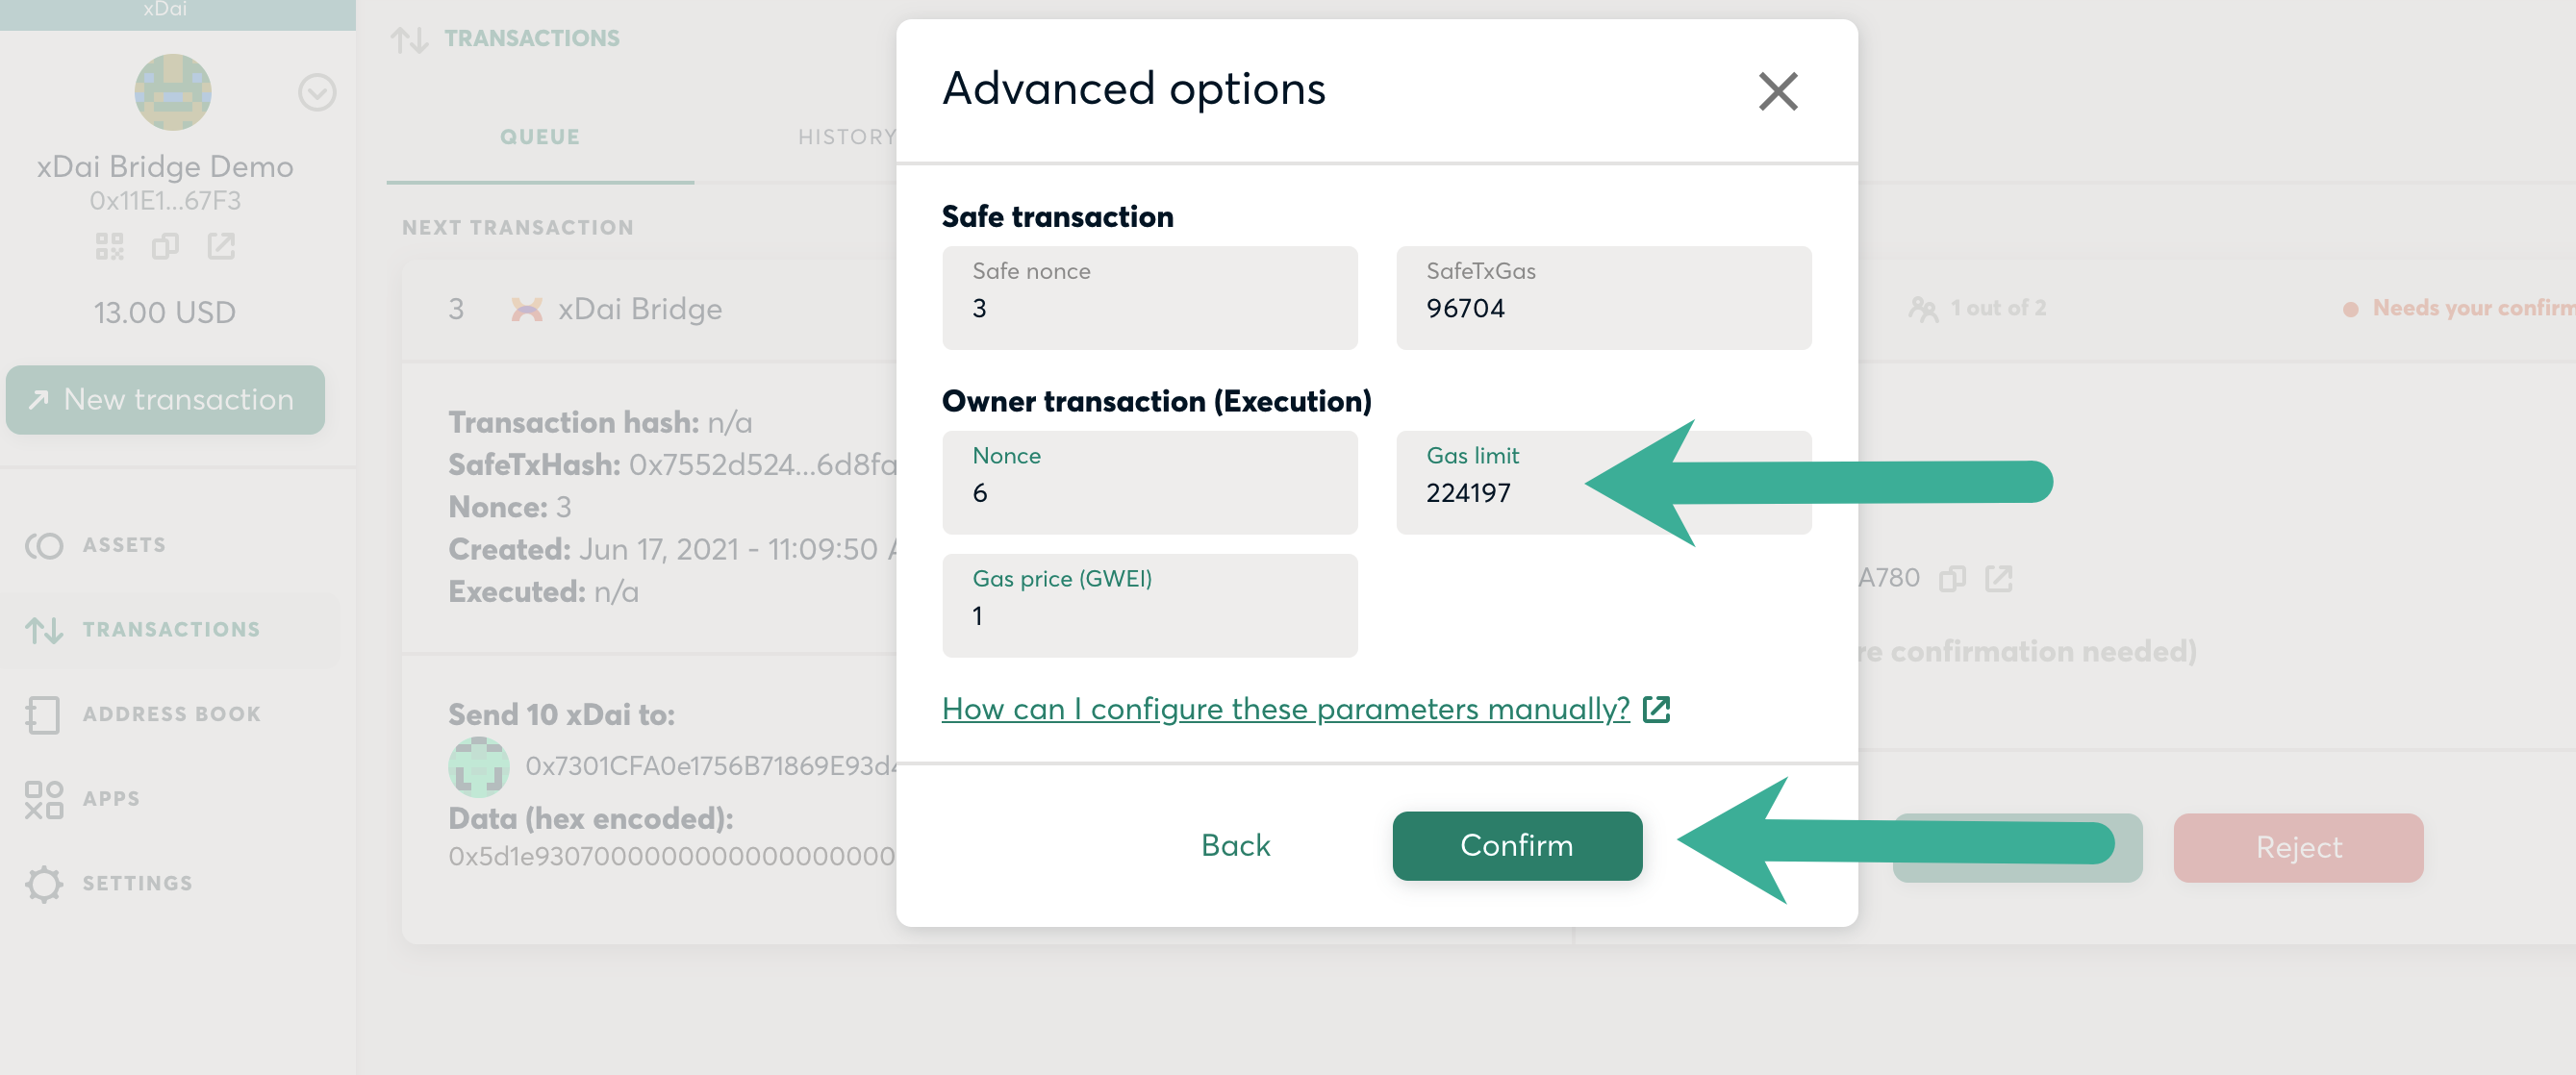
To fix, go to Advanced options and raise the gas limit. In this example we raise by 100,000 (initially was set to 124197) which results in a very small increase in cost since the transaction is on Gnosis.
You can set higher if desired - the transaction will only use the amount required within the set limit.
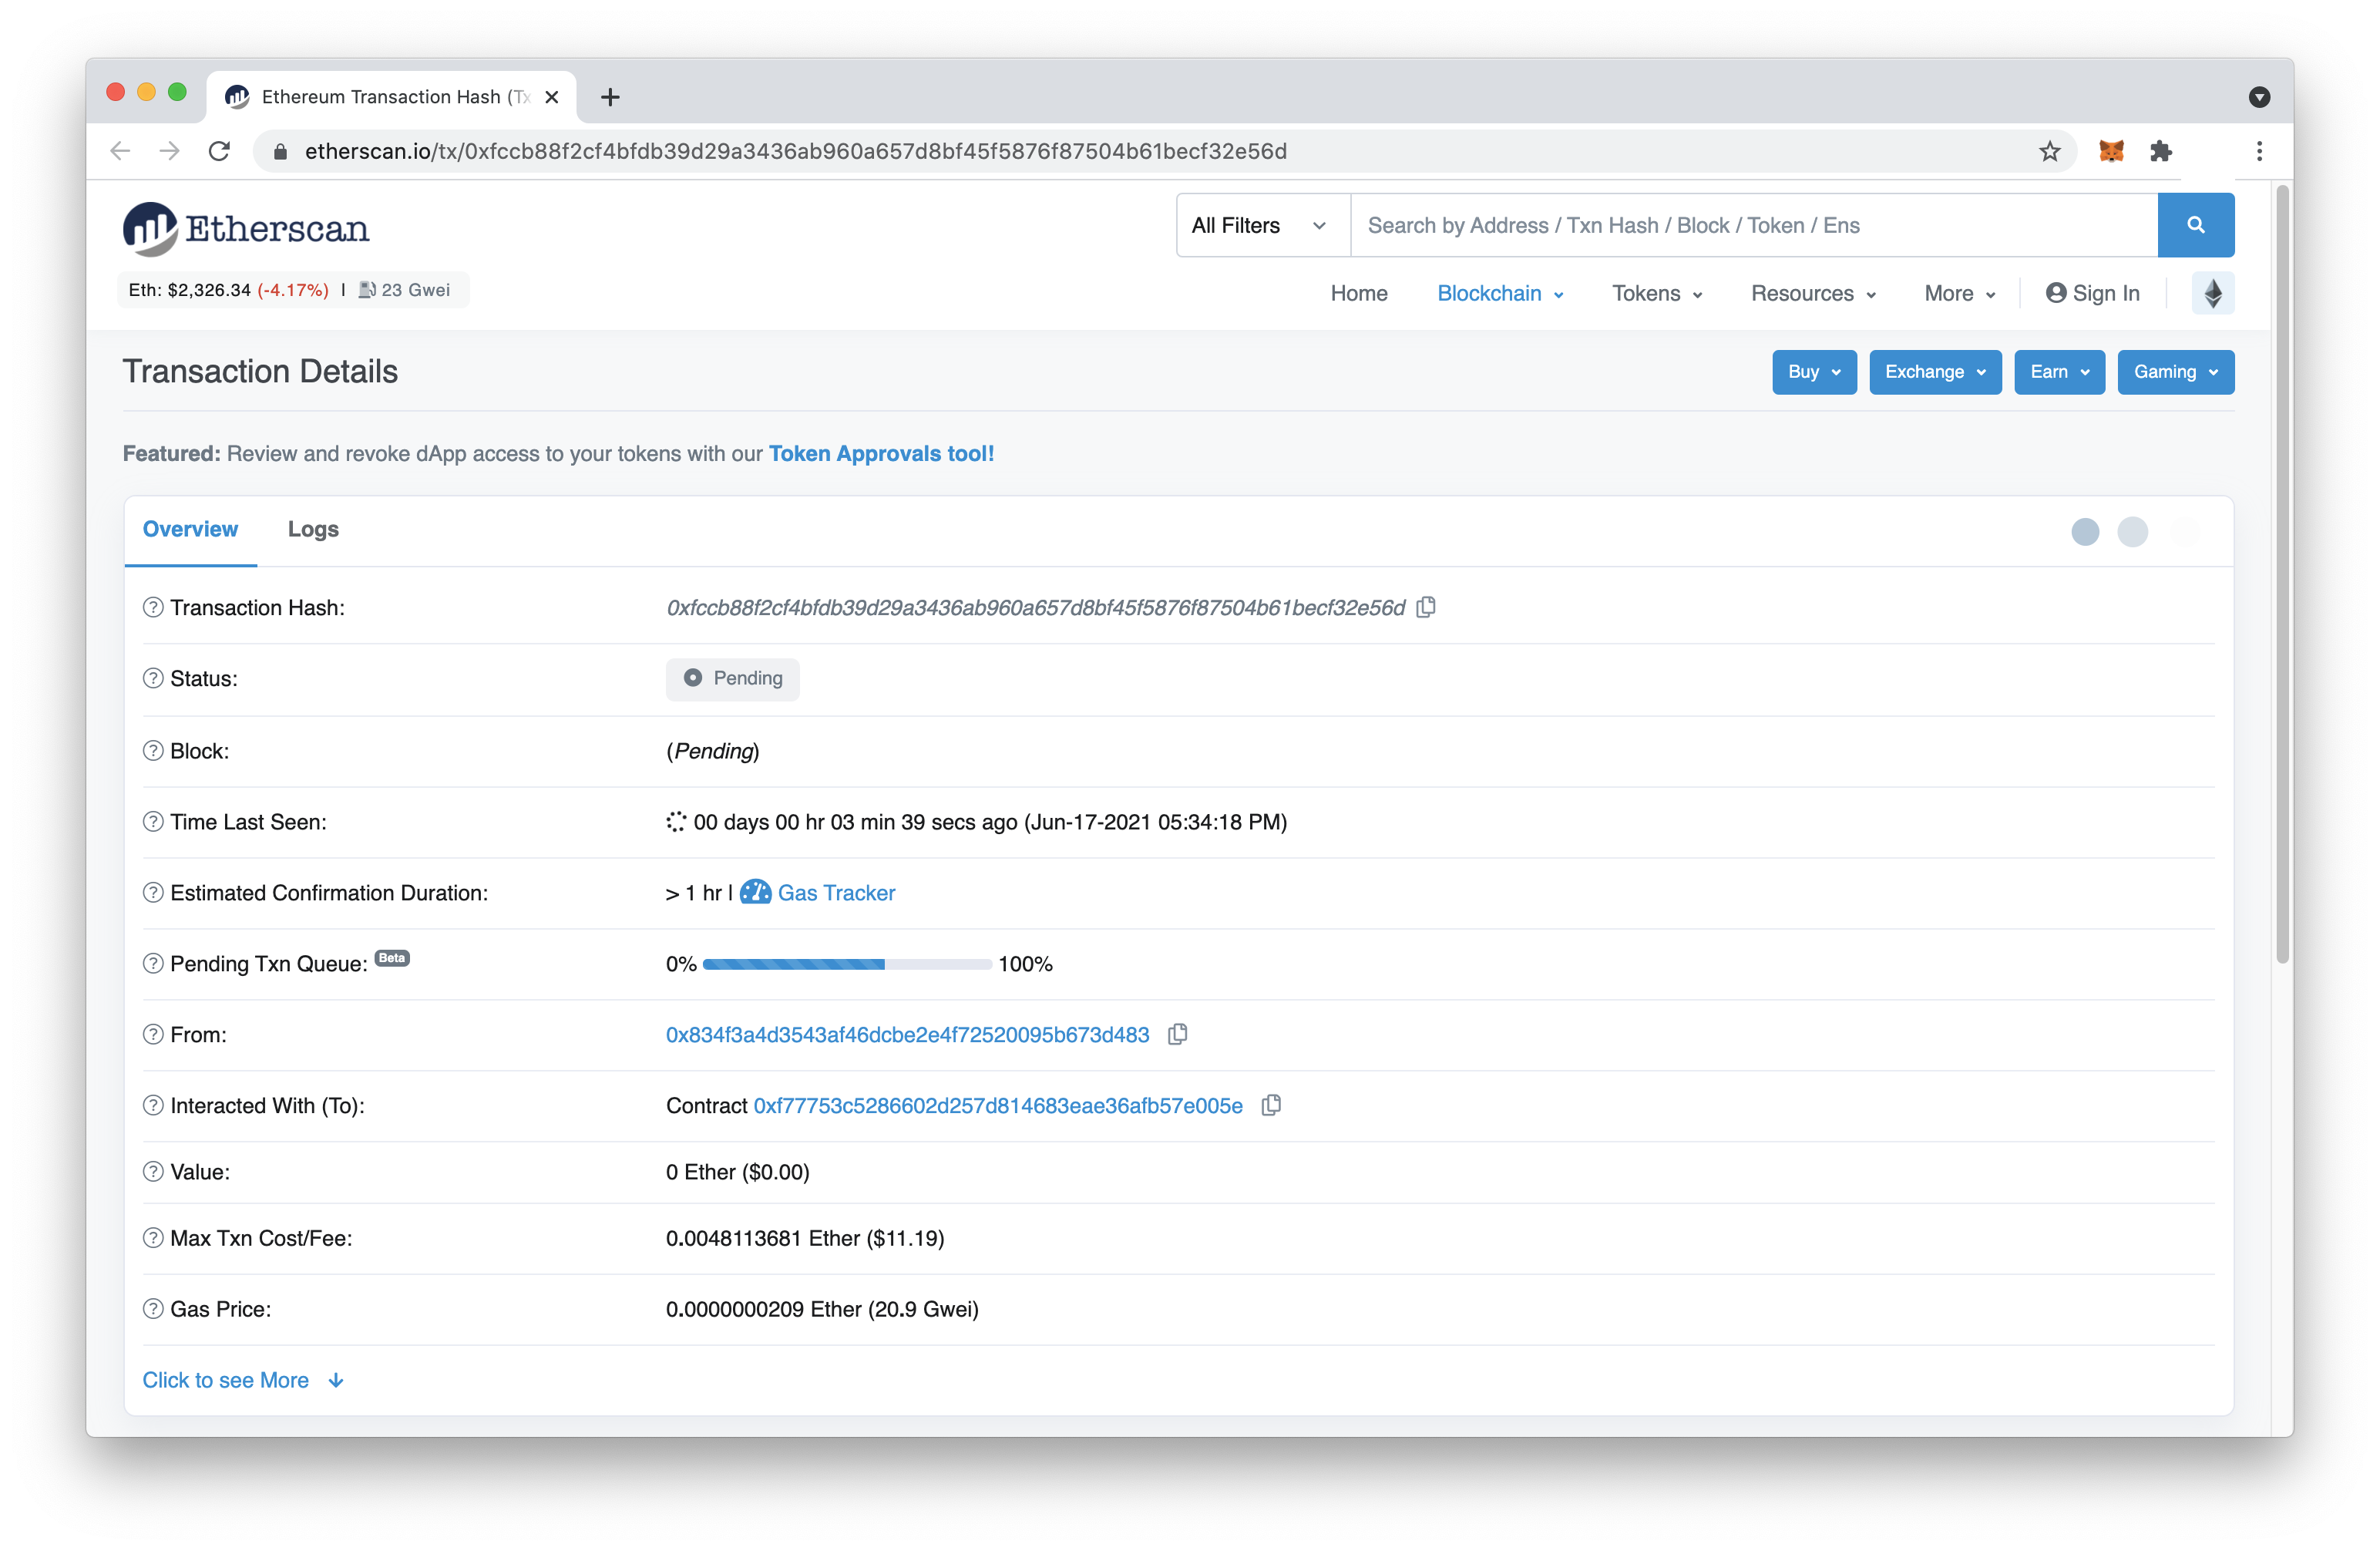
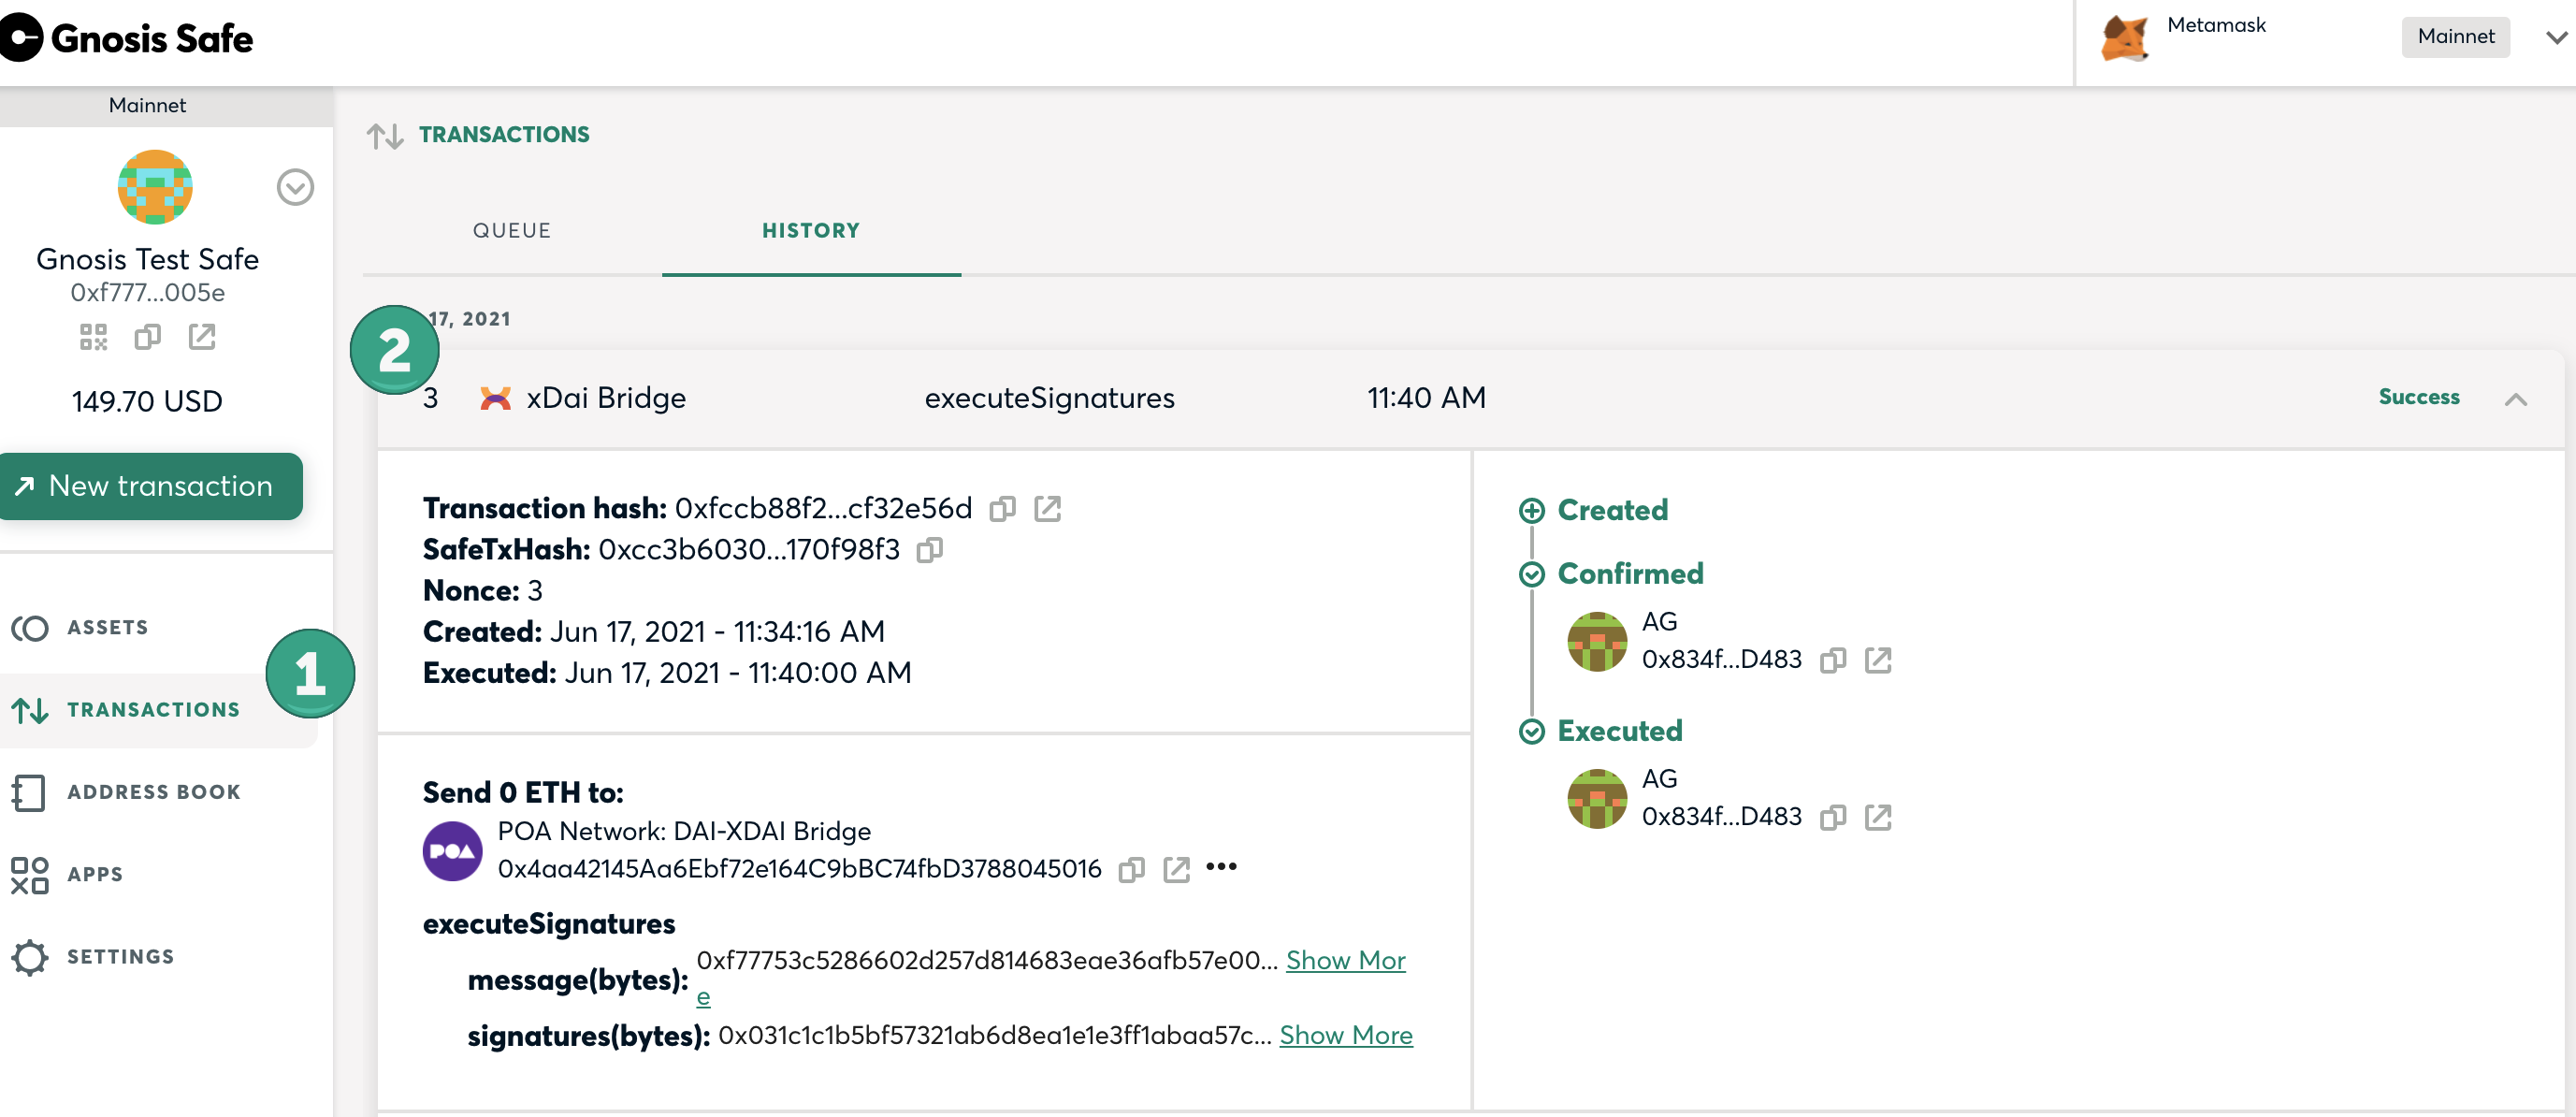
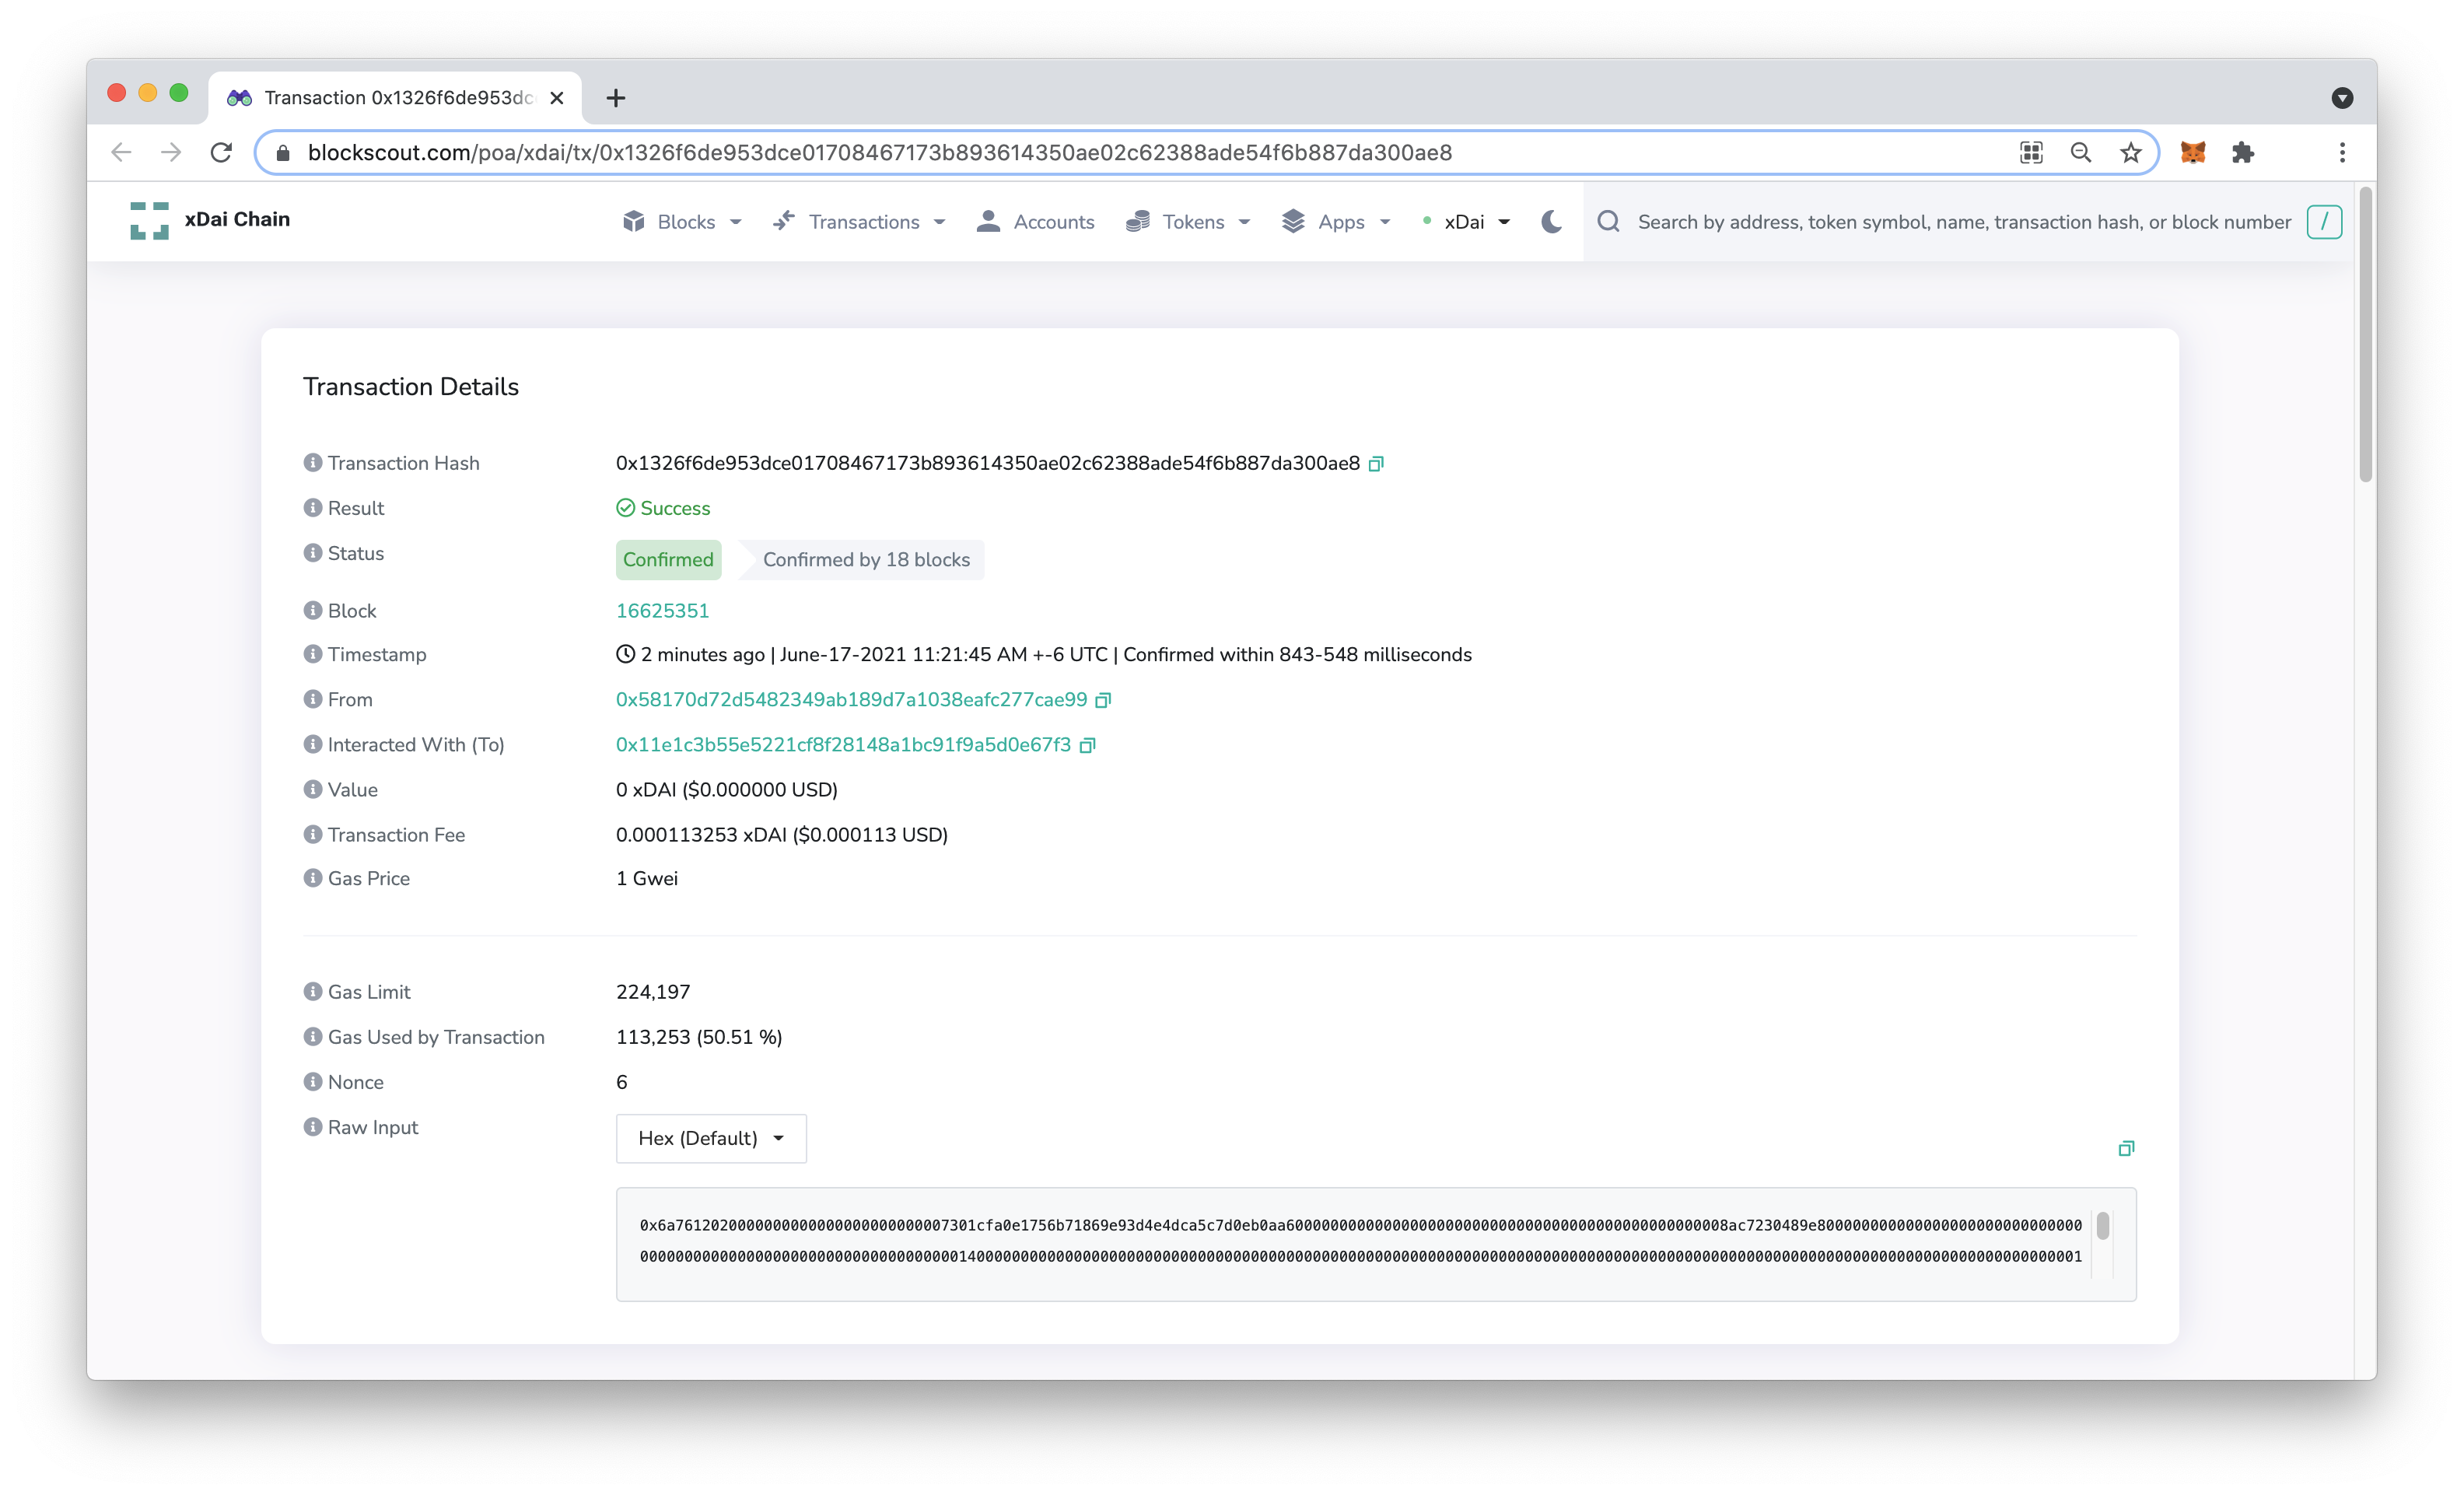
- Once confirmed, you can close the safe application on xDai. Find the transaction details on BlockScout by clicking on the transaction in the MetaMask Activity tab or by following the transaction history in the safe. Next, switch to a Gnosis Safe on Ethereum to complete the claims process.
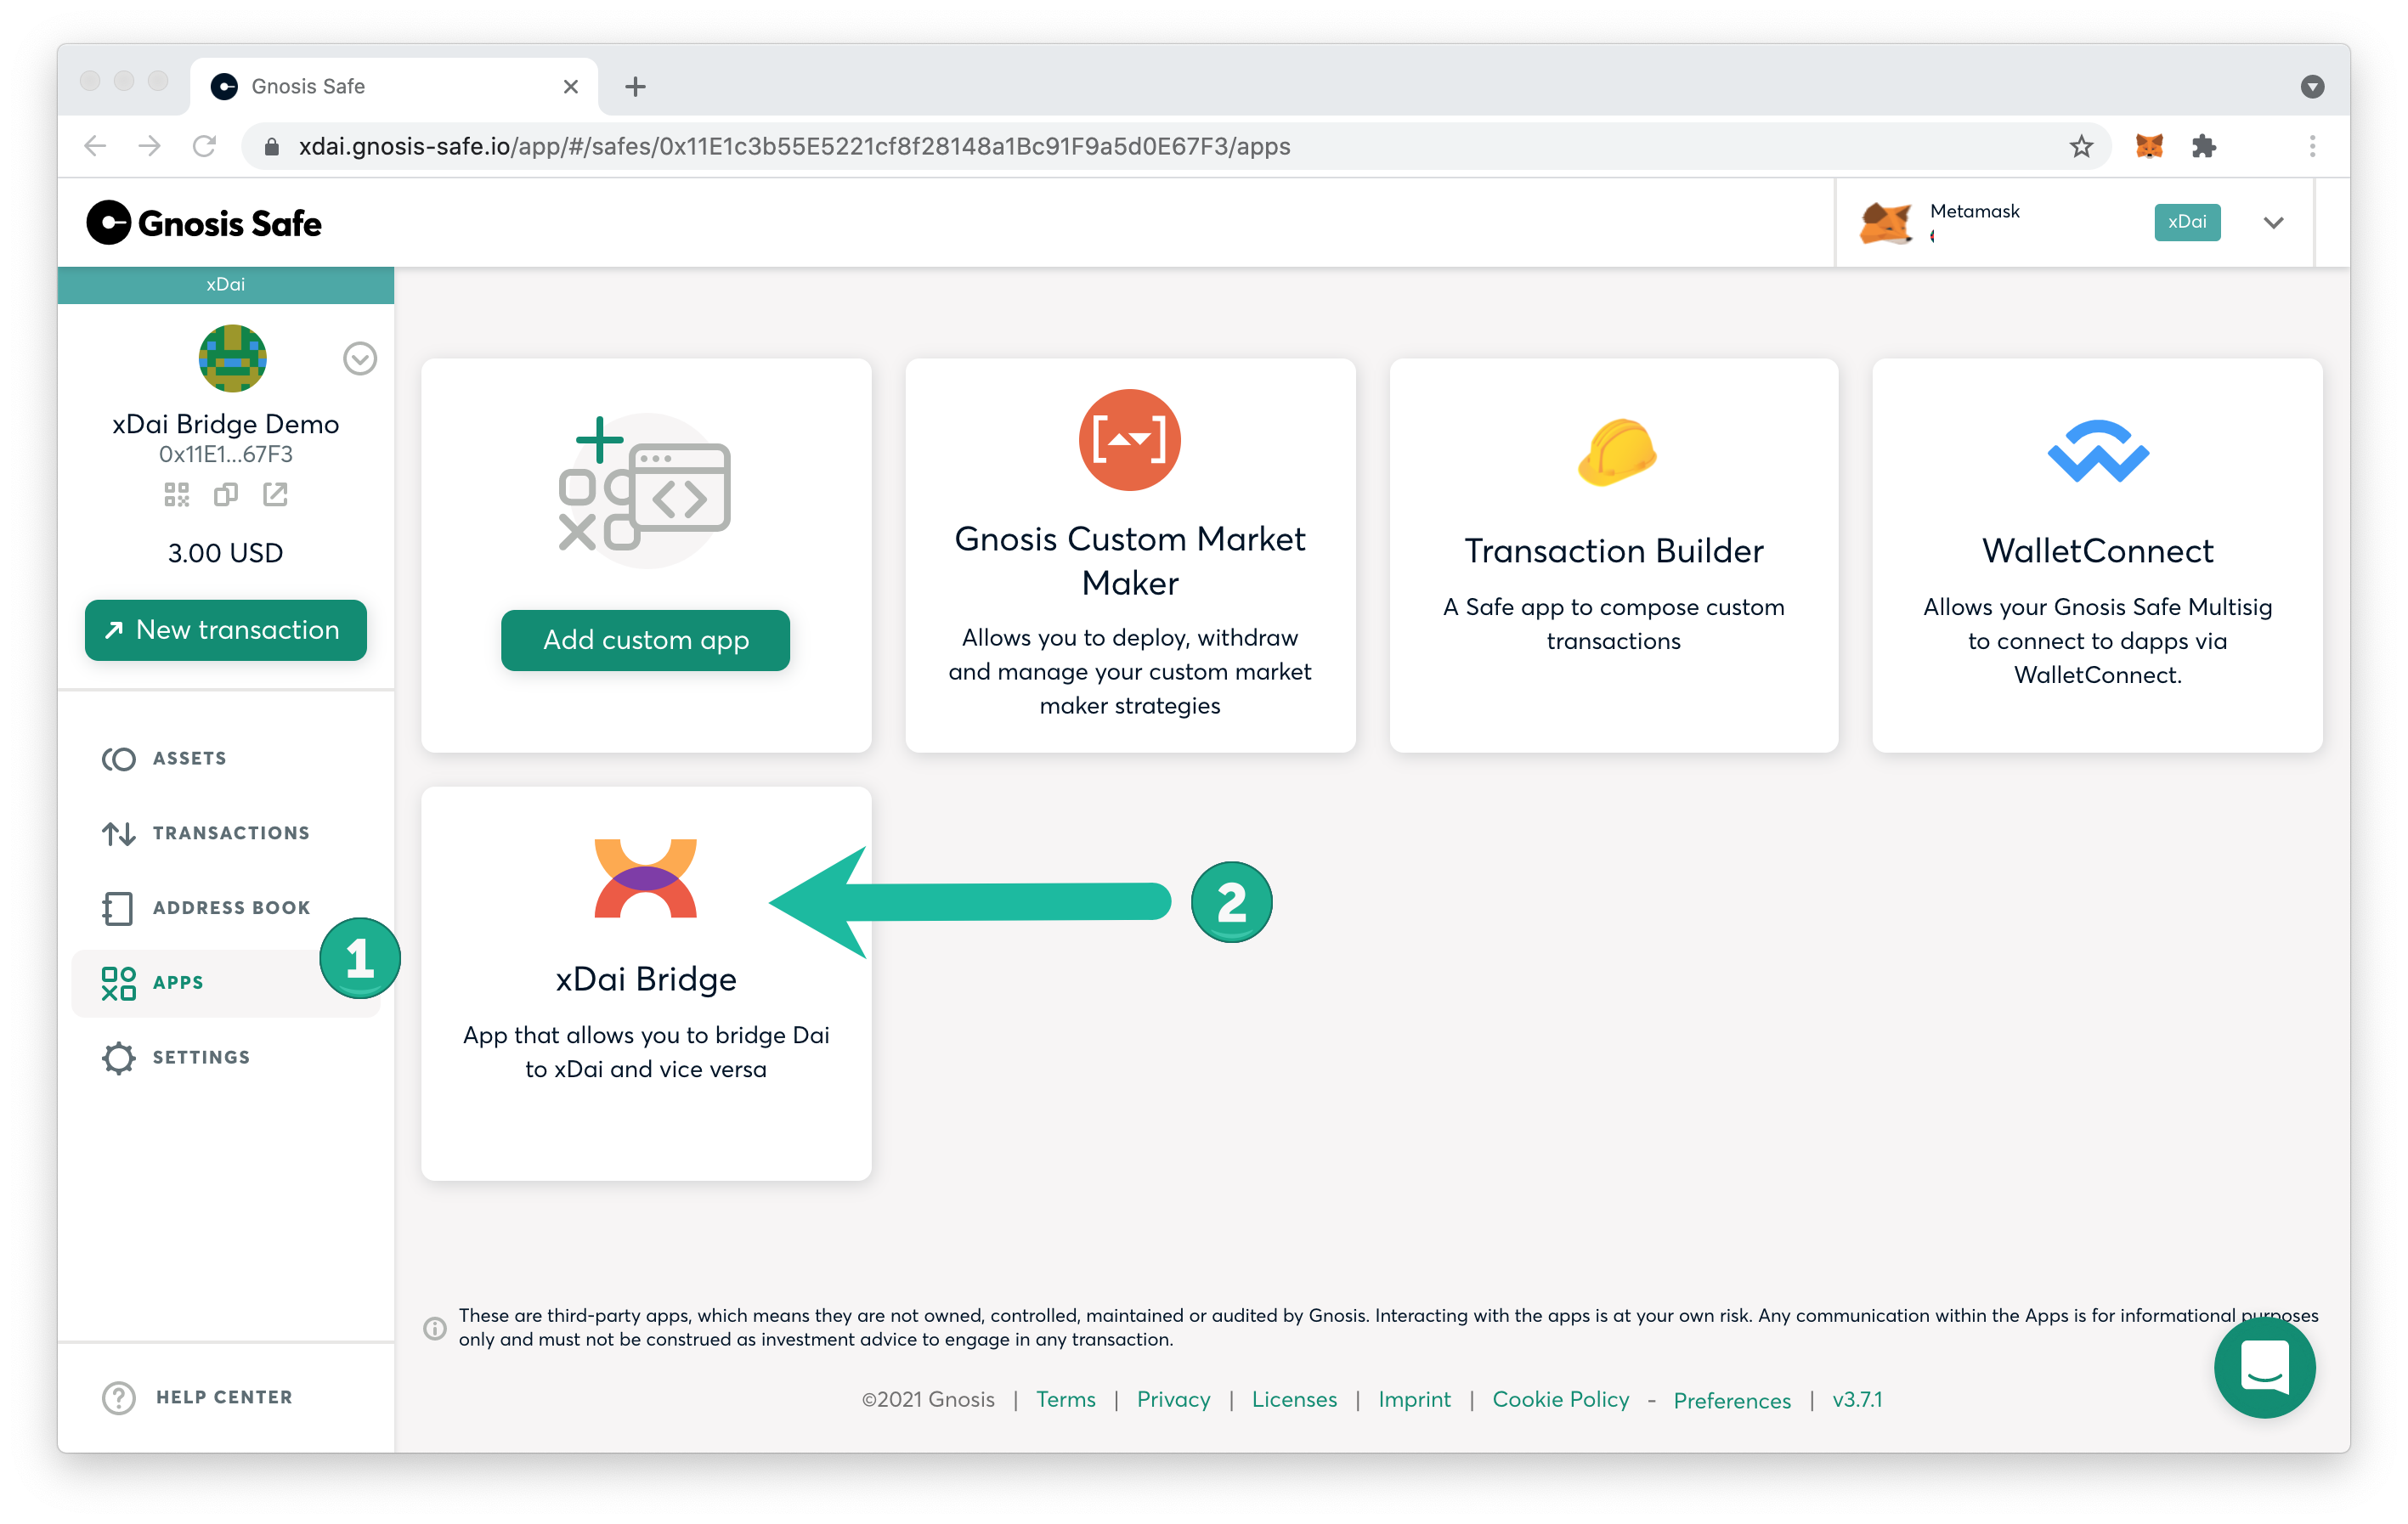
Bridge App on Receiving Chain: Claiming a Bridge Transaction
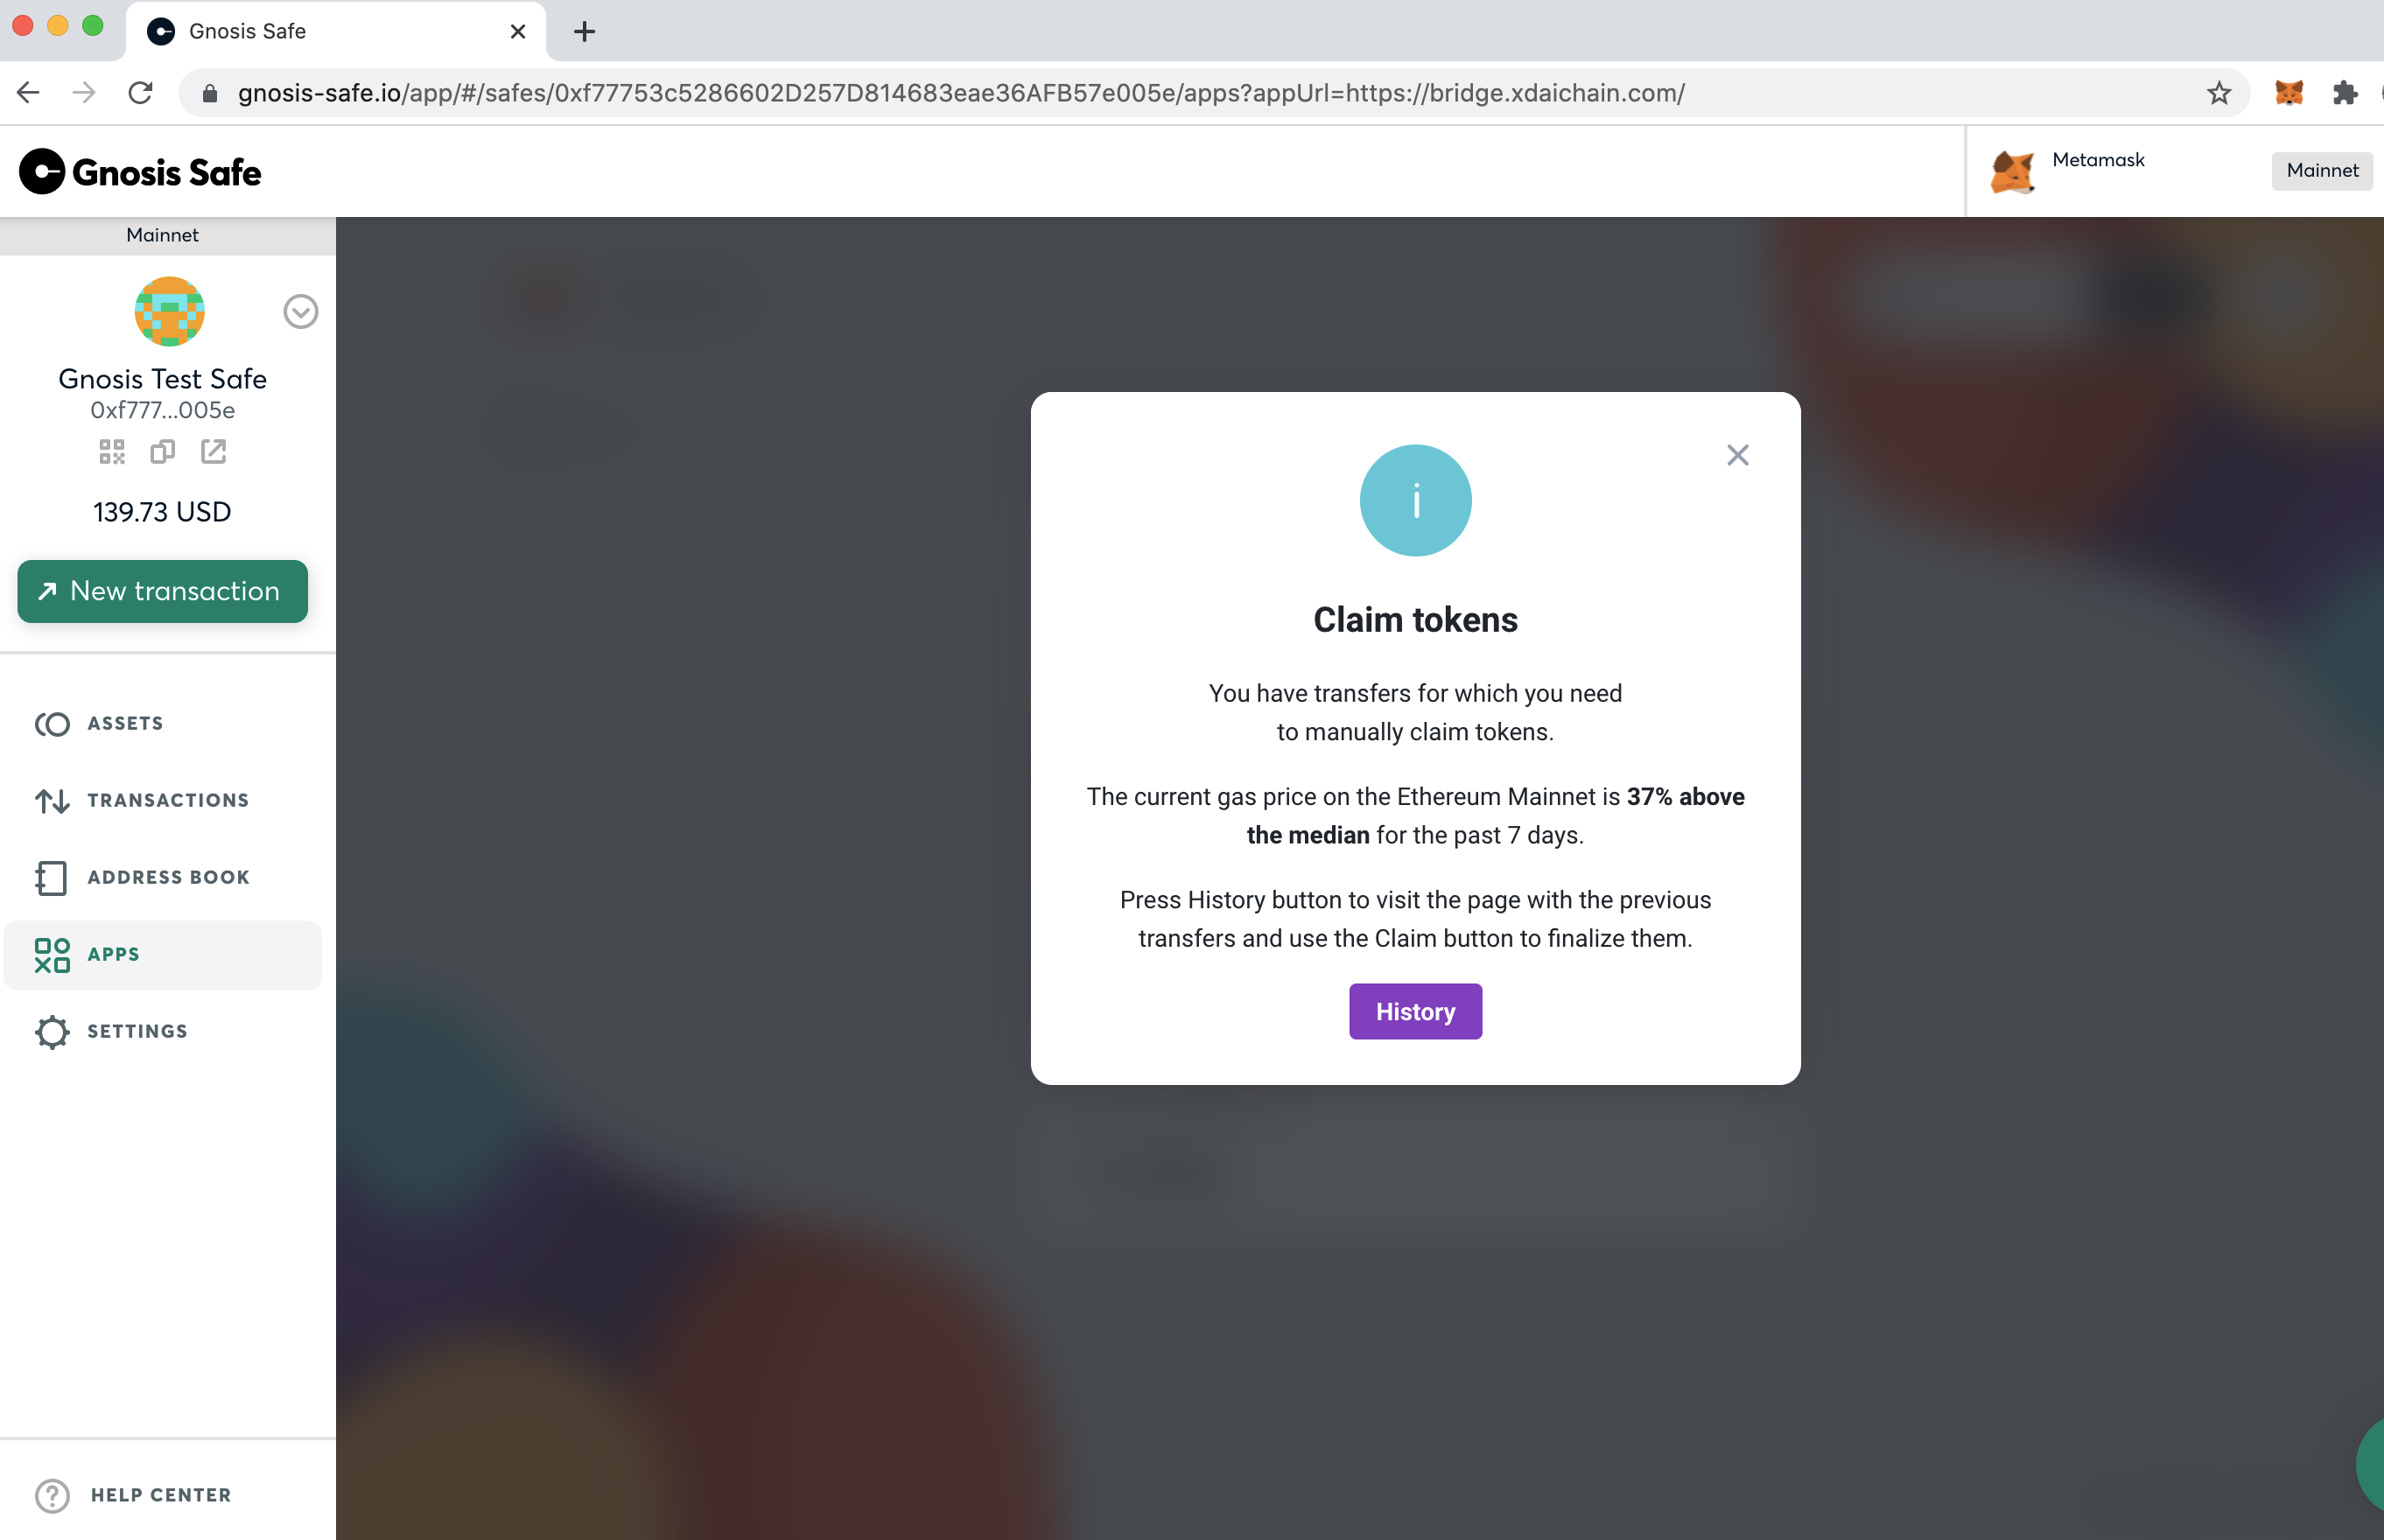
In this example, we sent xDai to a Gnosis Safe address on Ethereum. To claim the transaction and receive Dai, login to Gnosis Safe on Ethereum and open the xDai Bridge Application (located in the Apps menu).
- You should see the claim screen, click the History button to begin the process. If you do not see this screen, click on History at the top of the bridge app.
- Click the Claim button.
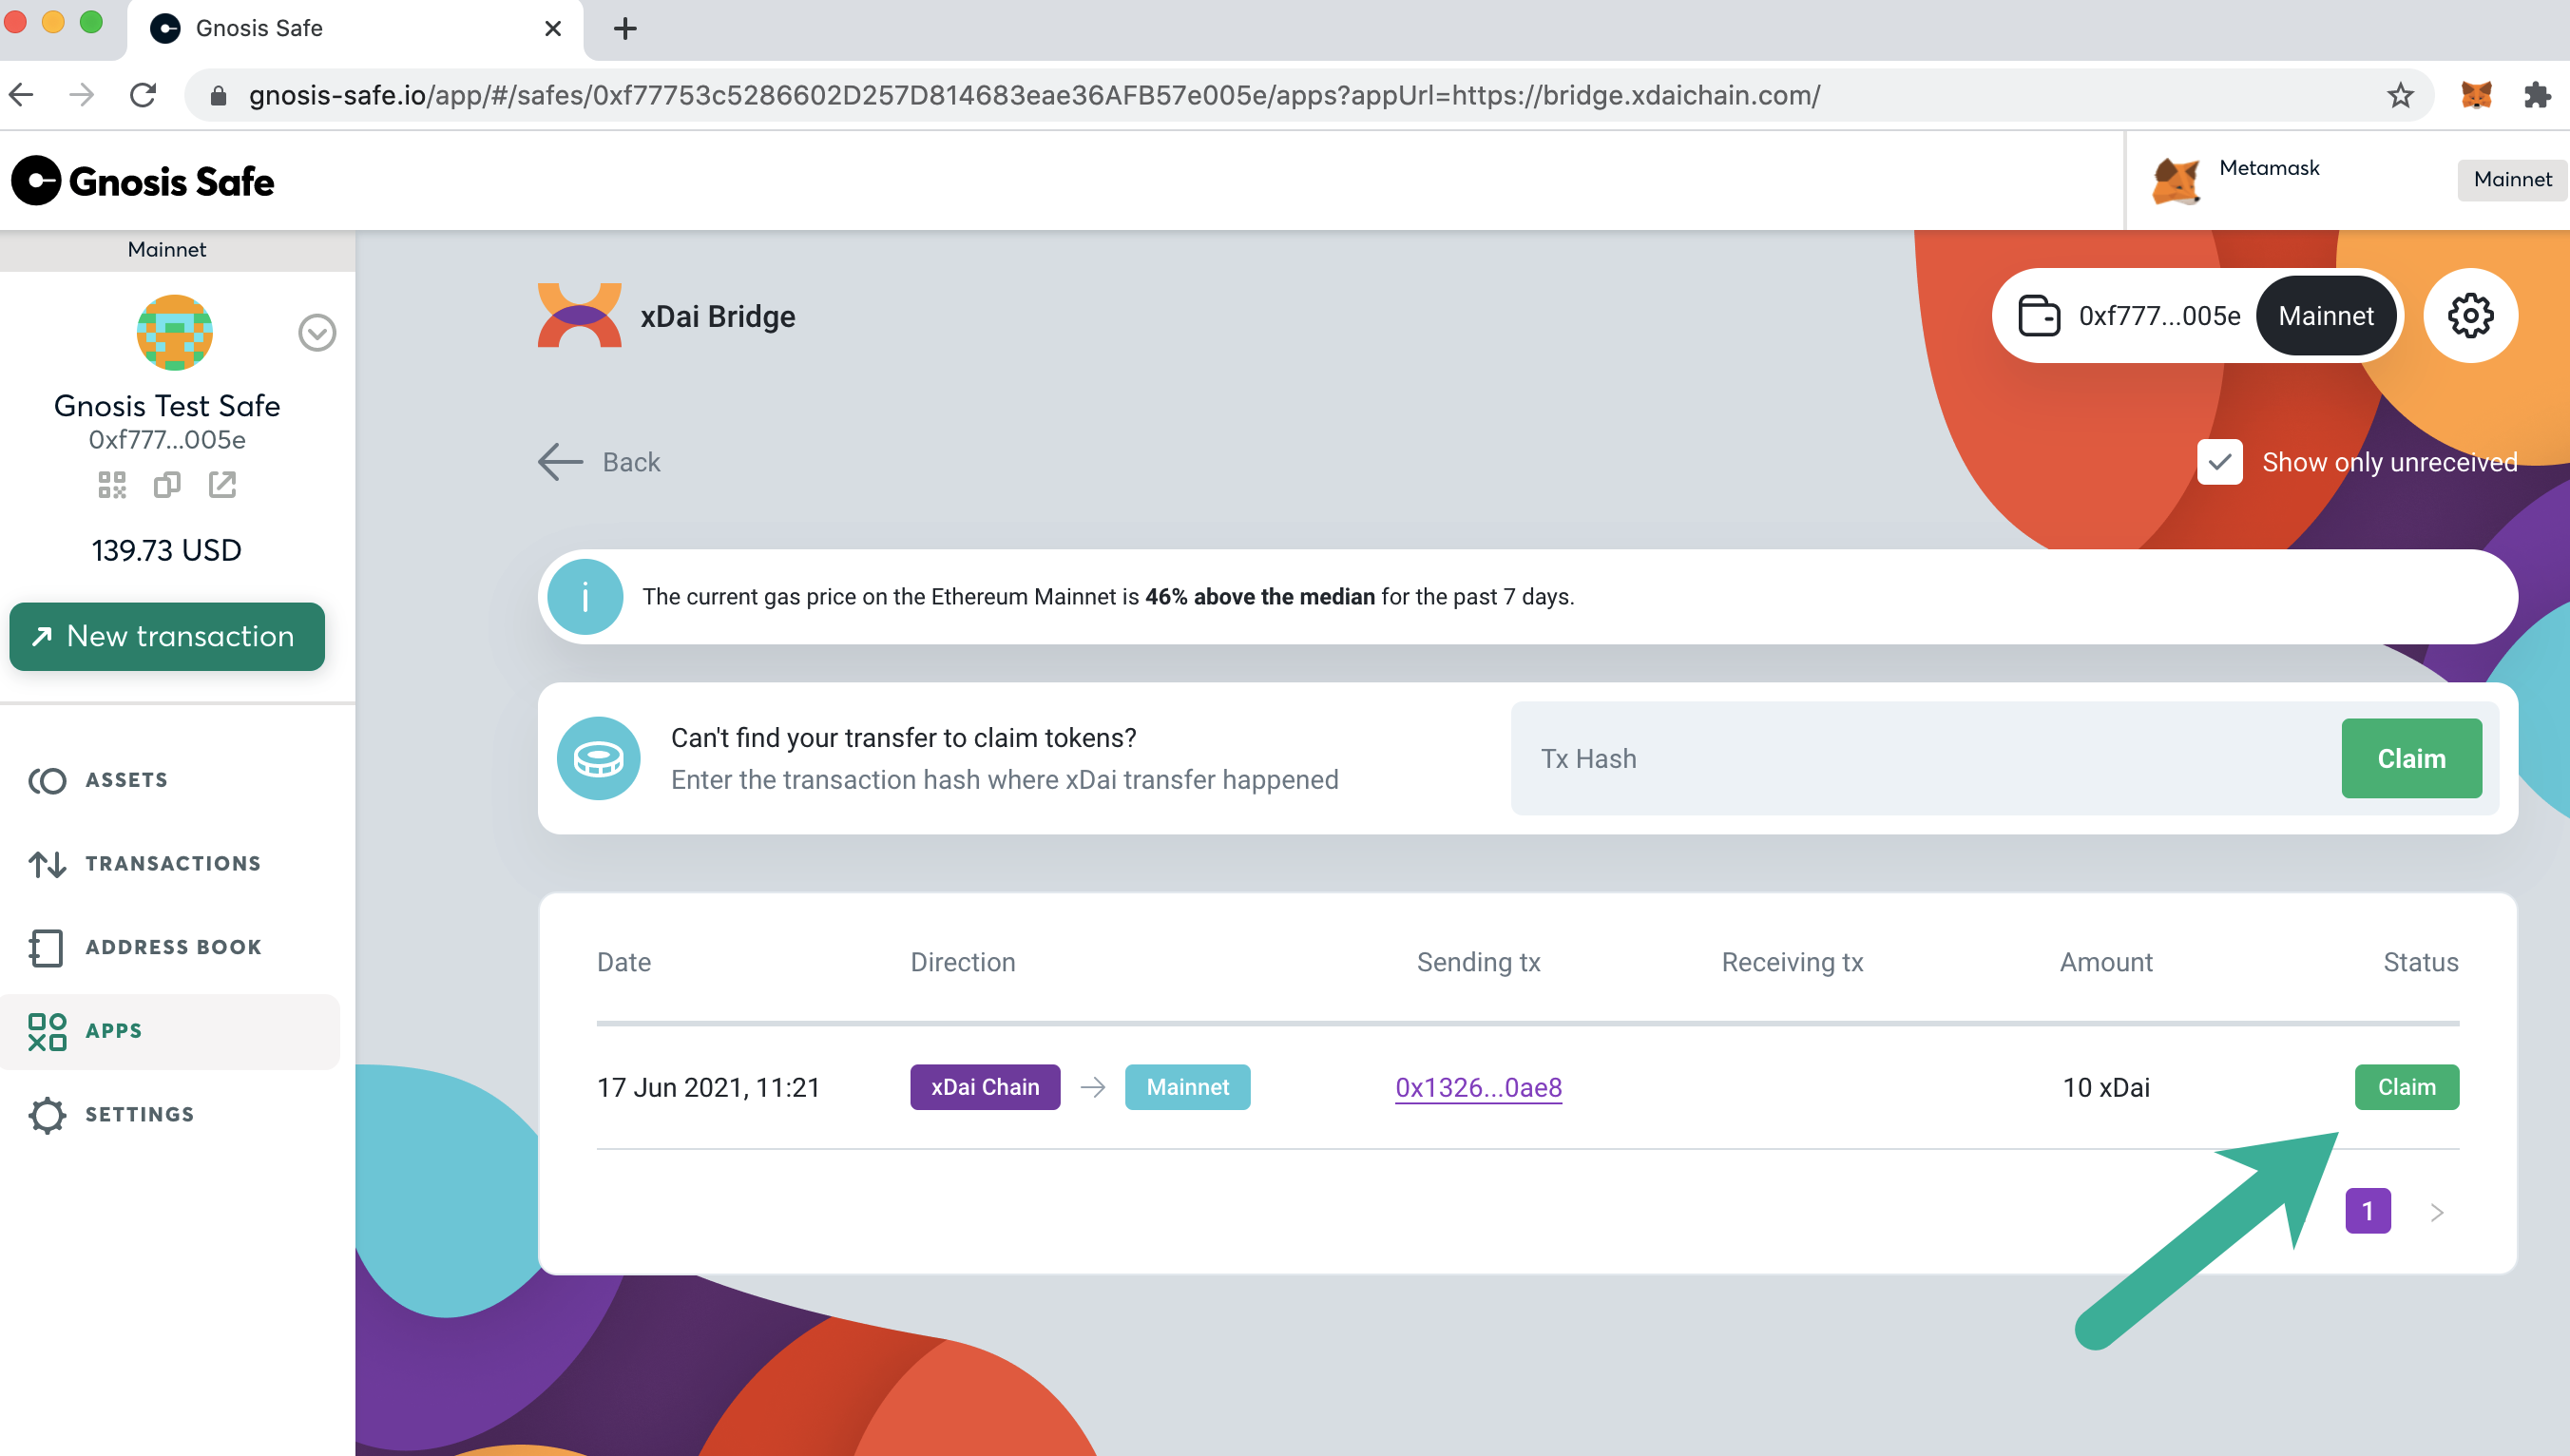
- All required owners must confirm the transaction before it is processed. Once the required signatures are collected, an owner can claim the transaction. The claim will require Eth, and can be completed anytime to optimize gas prices. Once completed, you can find the Etherscan link in your MetaMask Activity tab or the pending transaction pop-up.